How to send SMS from SQL database by Android SMS Gateway
This article is about sending SMS messages with only SQL code. The Ozeki SMS Gateway, that we recommend for customers seeking swift deployment without the constraints of service provider connections or specific hardware. In scenarios where expediency is key, we recommend leveraging the Android SMS Gateway, your go-to solution for sending and receiving SMS. Dive into the intricacies of our process: the Ozeki SMS Gateway reads SMS messages from an SQL database, transmitting them to the Android SMS Gateway, which then efficiently dispatches the SMS. Our page is your comprehensive guide to setting up SQL connections and sending SMS messages with SQL code.
What is Android SMS Gateway?
The Android SMS Gateway is an SMS app that turns your Android mobile phone into an SMS modem.
How to send SMS from SQL database by Android SMS Gateway (Quick steps)
Send SMS from SQL database by Android SMS Gateway:
- Add new application
- Install SQL messaging application
- Install MySQL connection
- Configure MySQL connection
- Eestablish MySQL connection
- Insert message into database
- Inserted message sent successfully
- see Android connection message log
How to send SMS from SQL database by Android SMS Gateway (Video tutorial)
In this video, we guide you through the process of sending SMS messages using the Android SMS Gateway with SQL code. We cover a range of steps, starting from adding a new application, installing the SQL application, and configuring connection settings. We delve into the details of the entire process of intricacies of inserting messages with SQL code. By the end of the video, you'll understand how to send SMS messages through the Android SMS Gateway with SQL.
Step 1 - Add new application
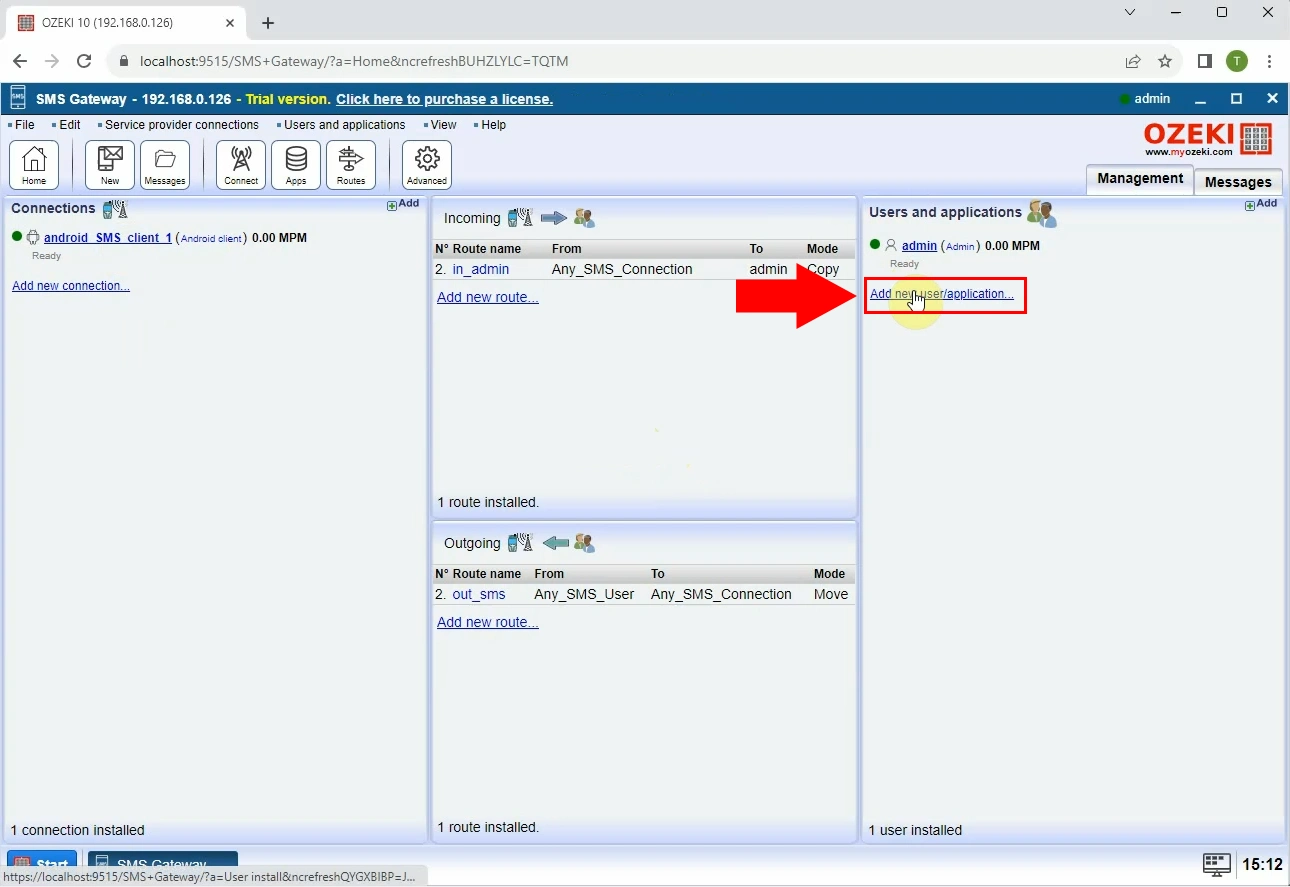
Navigate to the Users and Applications Panel, where you'll find a label that says "Add new user/application" (see Figure 1). Click on it to initiate the installation of a new application. It will open the panel where you can install applications.
Step 2 - Install SQL messaging application
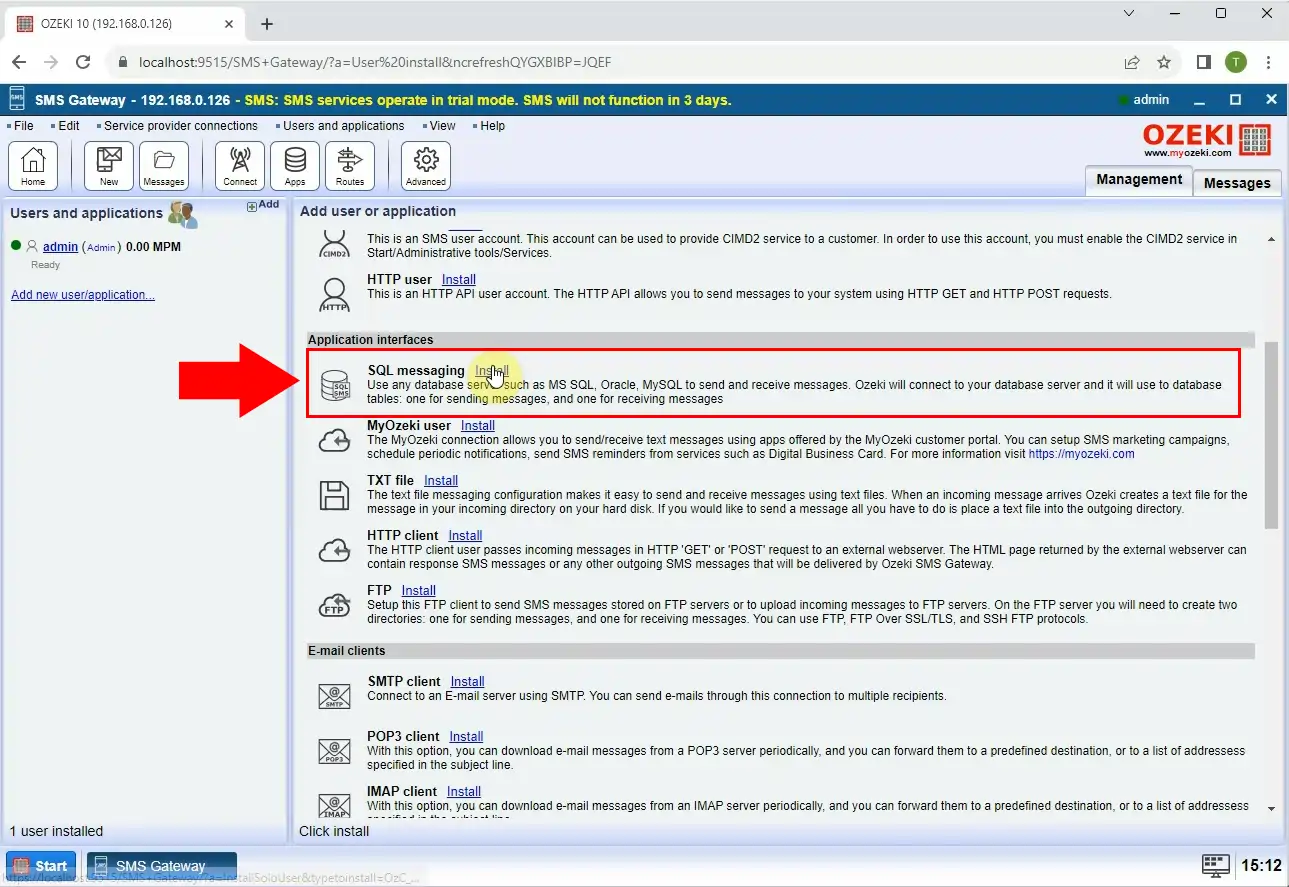
Scroll down to the "Application Interfaces" section and click "Install" next to SQL messaging (see Figure 2). This action will take you to a new page where you can proceed with the installation of a SQL messaging system.
Step 3 - Install MySQL connection
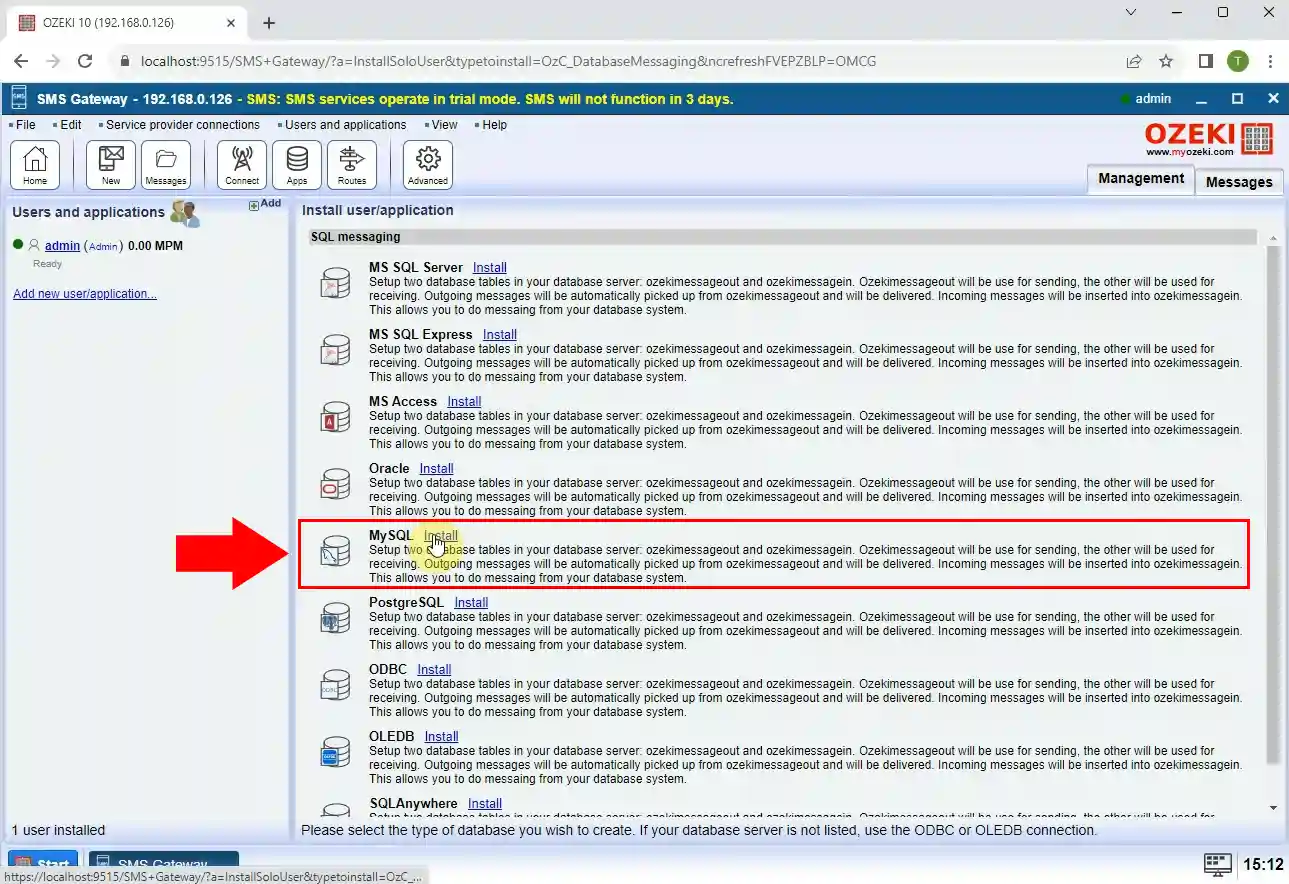
In this section, locate MySQL and click on "Install" (see Figure 3). This straightforward process will configure the MySQL connection service within the Ozeki SMS Gateway.
Step 4 - Configure MySQL connection
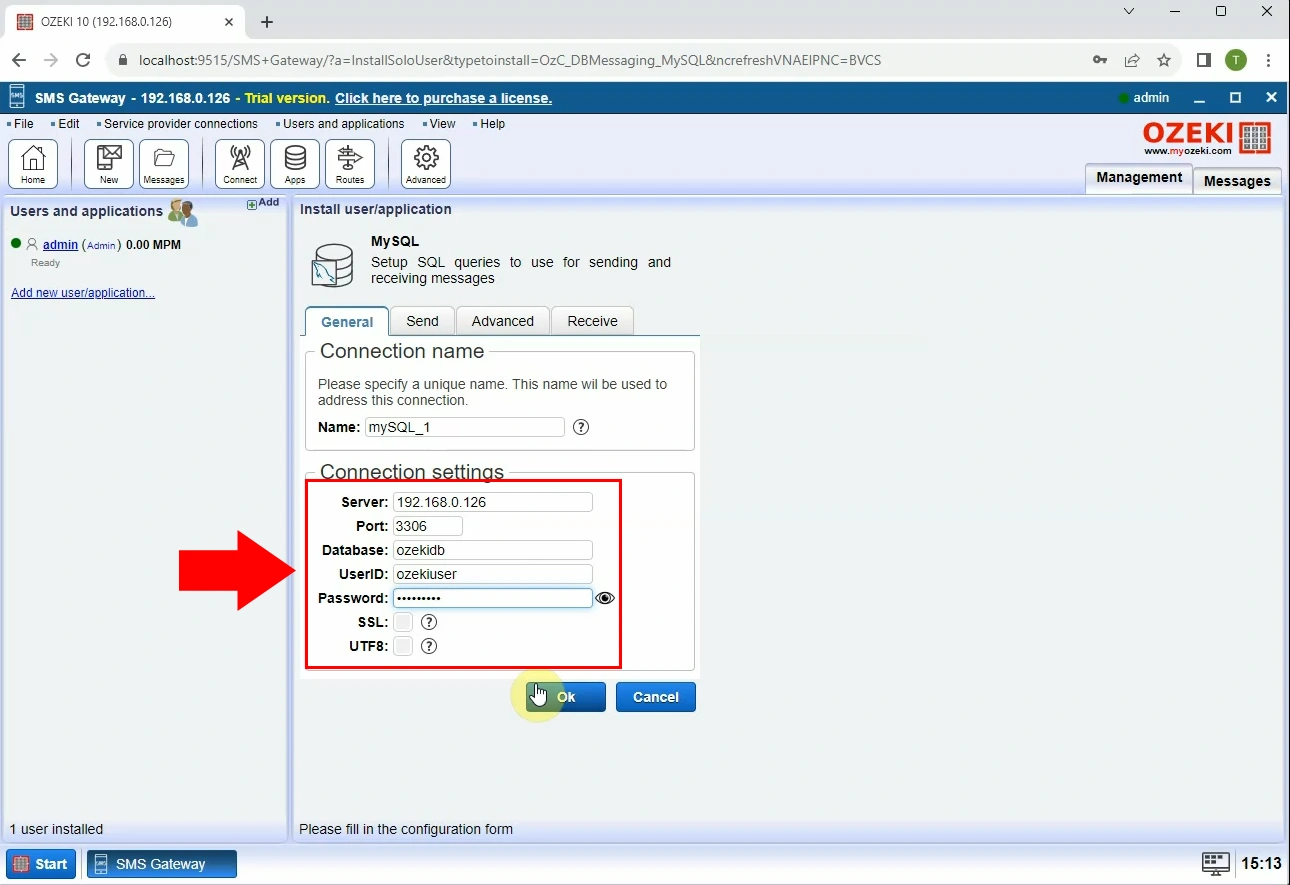
To configure MySQL connection fill out the form inside the General tab (see Figure 4).
- Server: IP address of the SQL server. In our case: 192.168.0.126
- Port: Port of the database server, In our case: 3306
- Database: Name of the Database. In our case: ozekidb
- User: Username. In our case: ozekiuser
- Password: password of the User. In our case: *********
Step 5 - establish MySQL connection
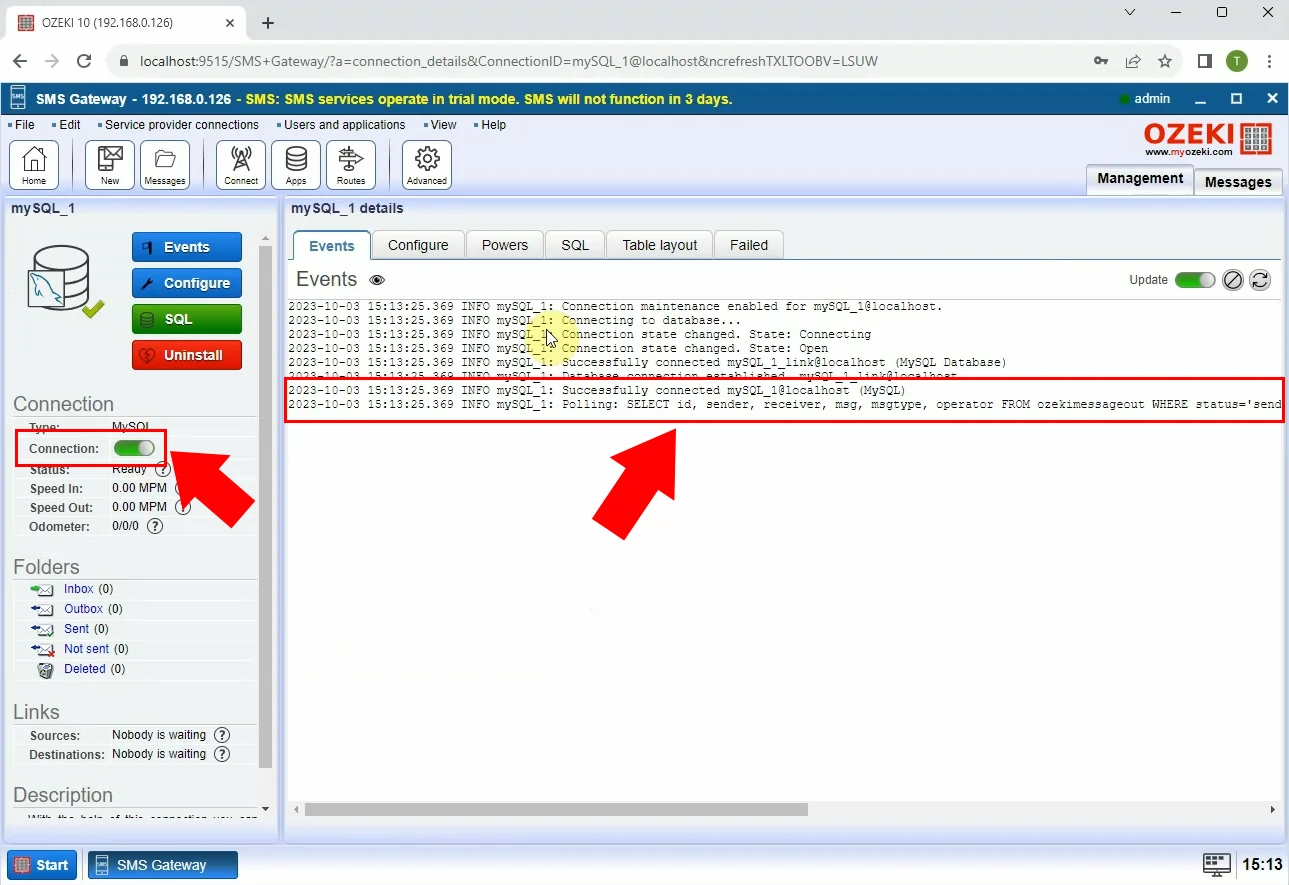
If you've successfully followed the four steps, you're now prepared to launch the connection. To initiate the application, click on the slide button situated in the left panel. Verify the Events tab to confirm a successful connection status (see Figure 5).
Step 6 - Insert message into database
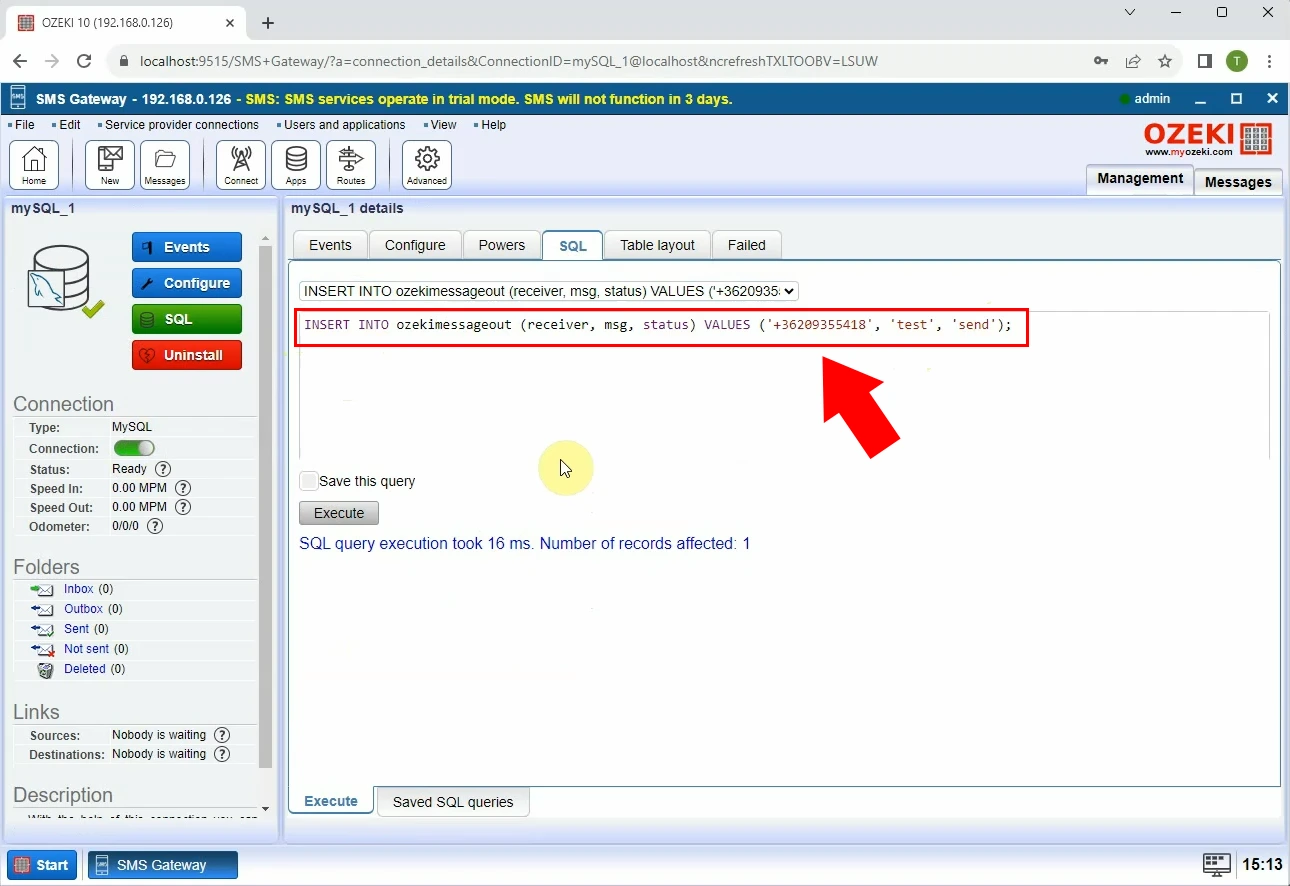
Next, go to the SQL tab, where you can input SQL code to dispatch a message (see Figure 6).
INSERT INTO ozekimessageout (receiver, msg, status) VALUES ('+3620935541', 'test', 'send');
This SQL code will generate a new message in the database, which will then be sent to the Android phone and subsequently delivered as an SMS.
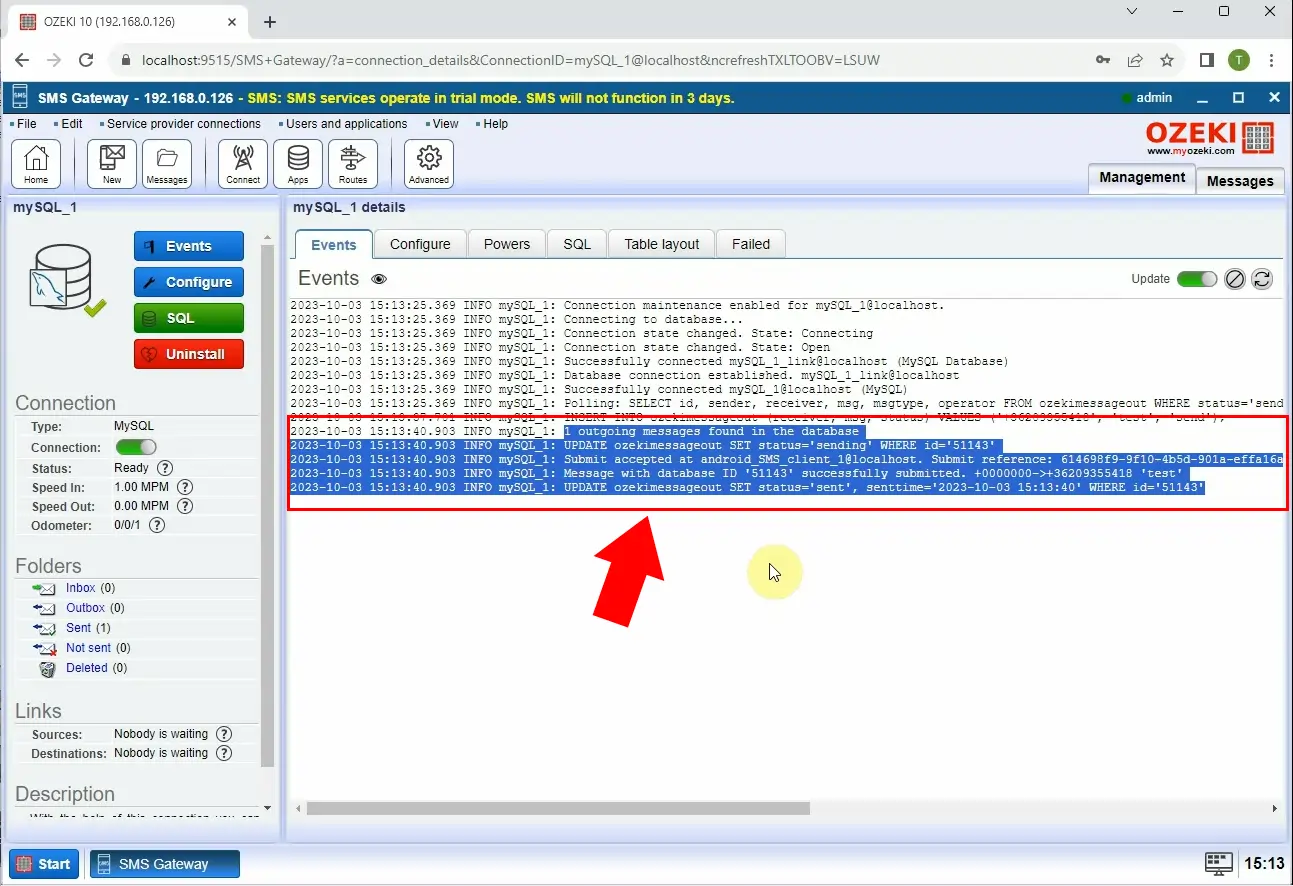
Inserted message sent
Within this log message, you'll observe that the Ozeki SMS Gateway has successfully processed. (see Figure 7).
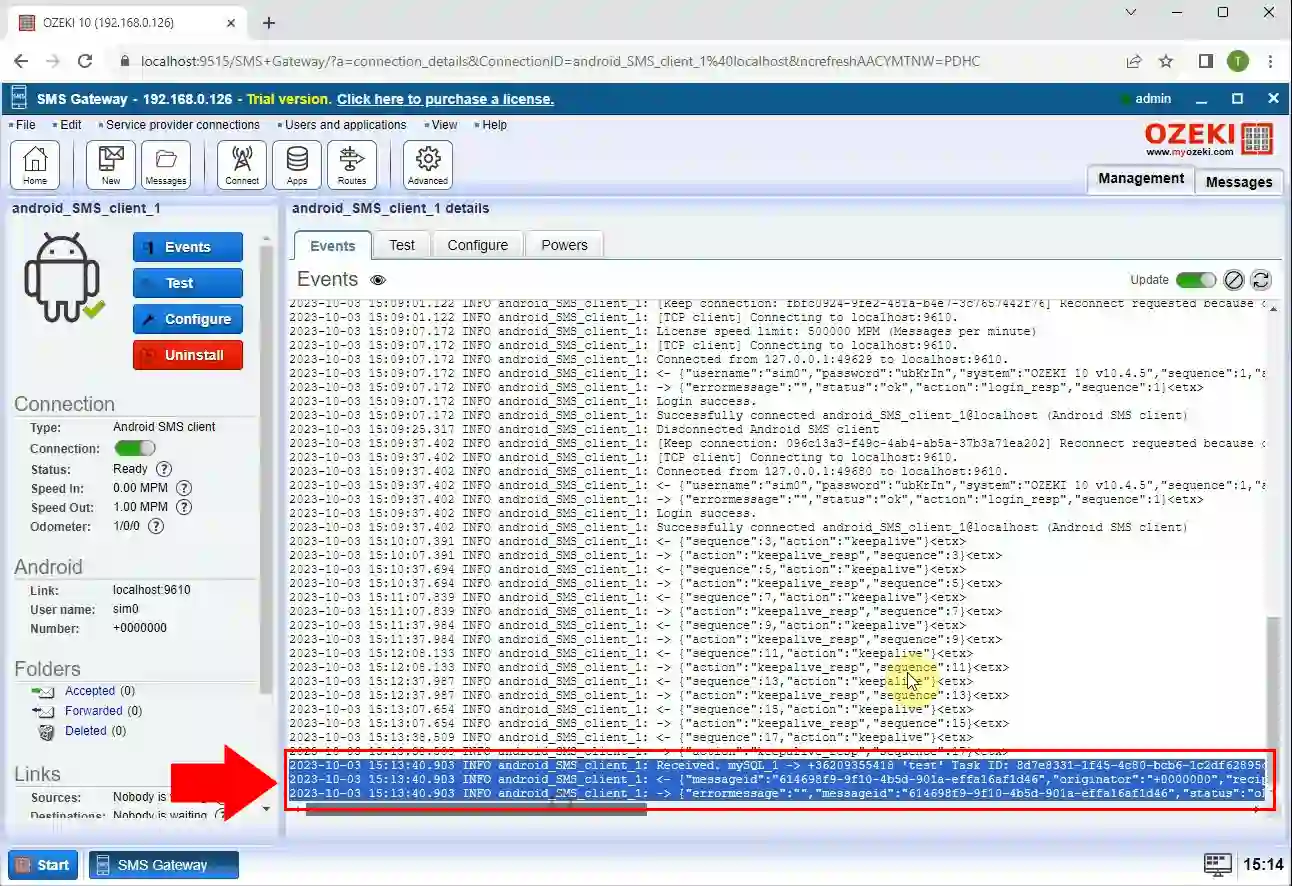
Android connection message log
Once the message is processed, it will be transmitted through the Android SMS Gateway. In this log, you can confirm the successful sending of the message (see Figure 8).
To sum it up
We did our very best to make it simple and to walk you through all the details as painlessly as possible. To recap the above procedure we can state, that to send sms messages with the SQL code is quite straightforward. To ensure long-term success, prioritize the development of a dependable SMS system; it truly is the key to victory. If you would like to receive more valuable information about the benefits of other smiliar solutions, please open ozeki-sms-gateway.com. I hope this guide will be helpful to all the readers.
