Learn the basics - Your first SMS campaign
Launching SMS campaigns is now easier than ever with the MyOzeki SMS service, which allows you to utilize your own mobile device as the gateway. In this guide, we will show you how you can set up your mobile device as your gateway and use MyOzeki to send the SMS messages automatically to your Contacts.
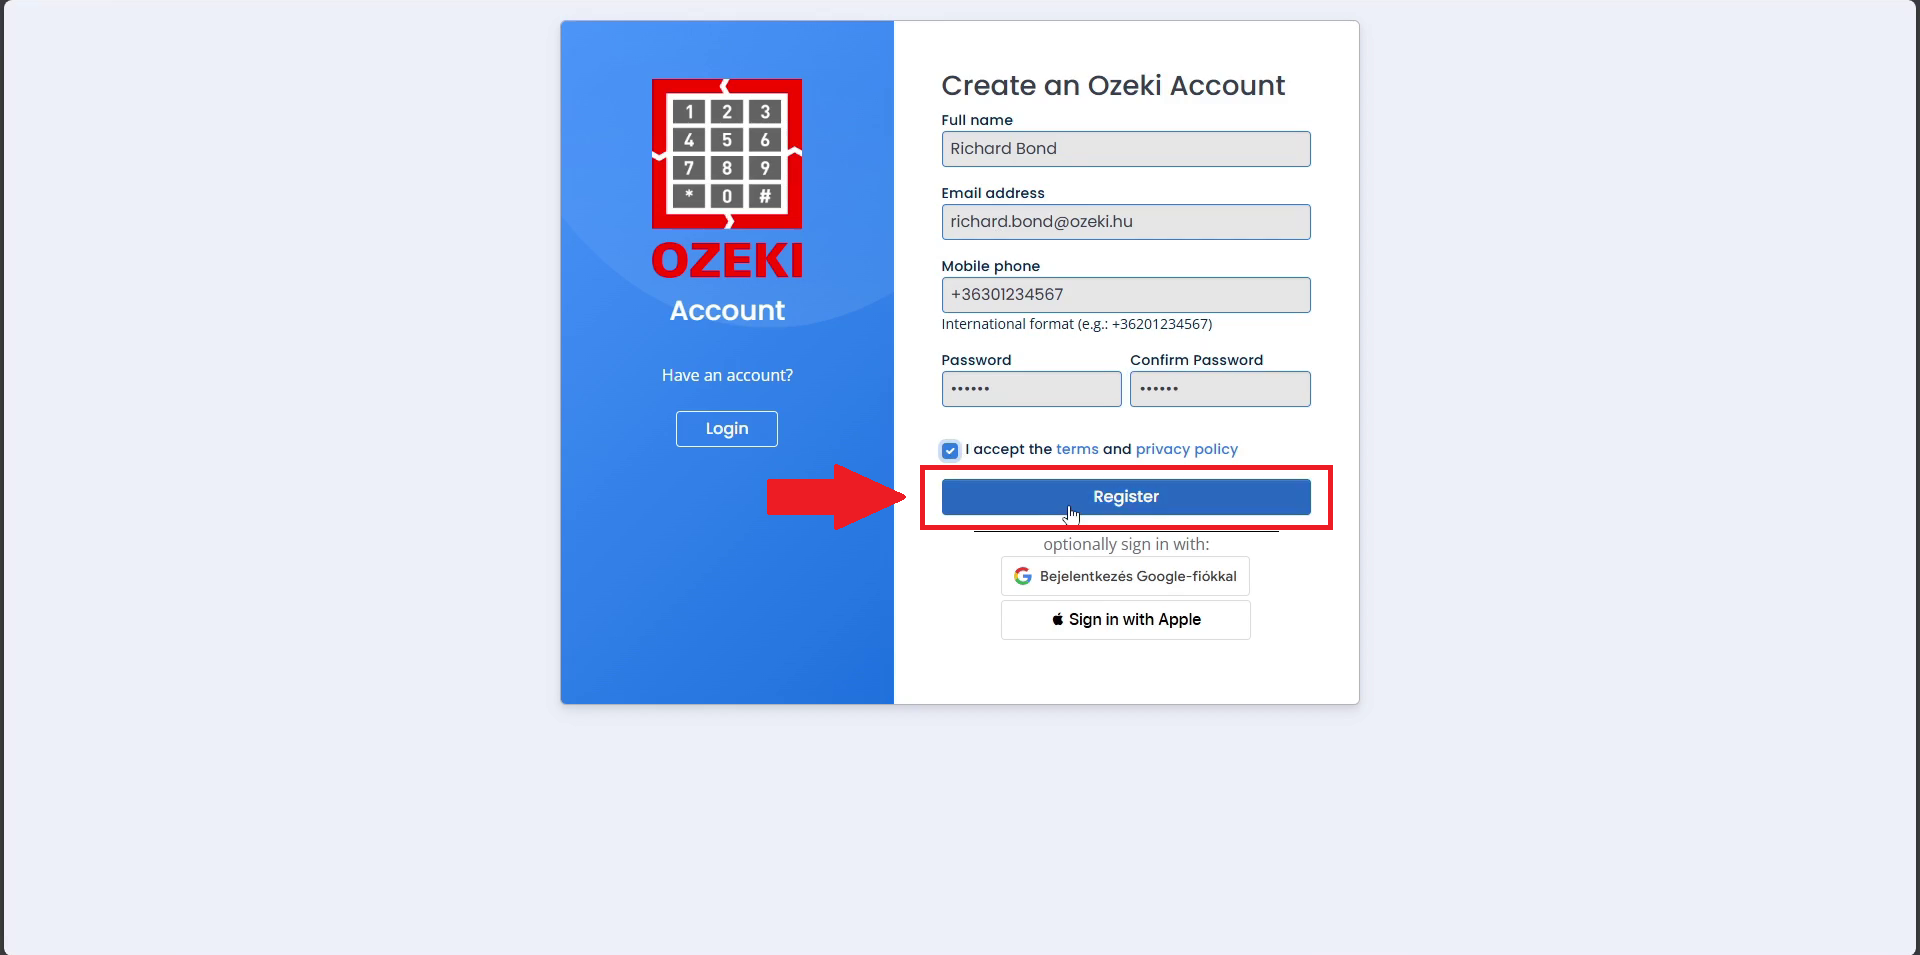
Step 1 - Register an account if you haven't already
To use MyOzeki Services, you will need an account, if you haven't already, create it now with the below tutorial, or you can skip this step and log in to your account.
Video Tutorial
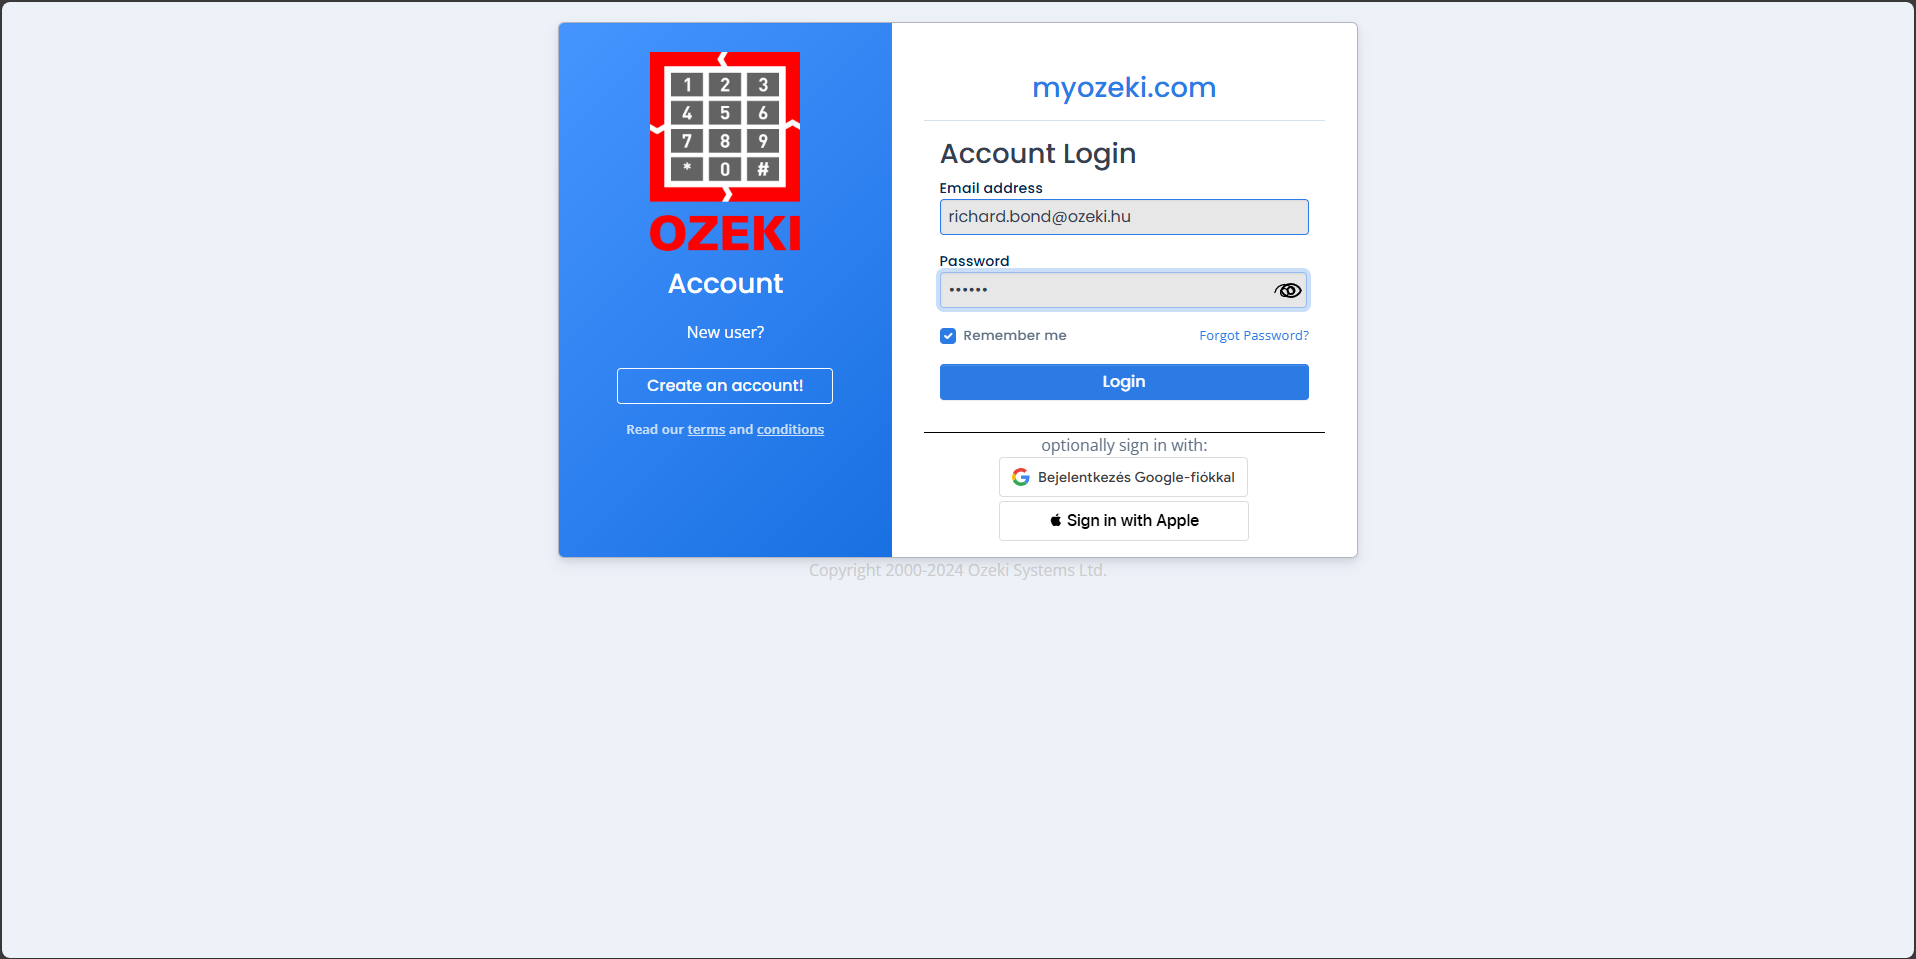
Step 2 - Log In to your account
After registering, you might need to log in to your account, by default you get automatically logged in after registering.
Step 3 - Open the SMS Service
Open the SMS service to start setting up your SMS campaign. You can open it in the navbar on the dashboard or from the favorites on the dashboard.

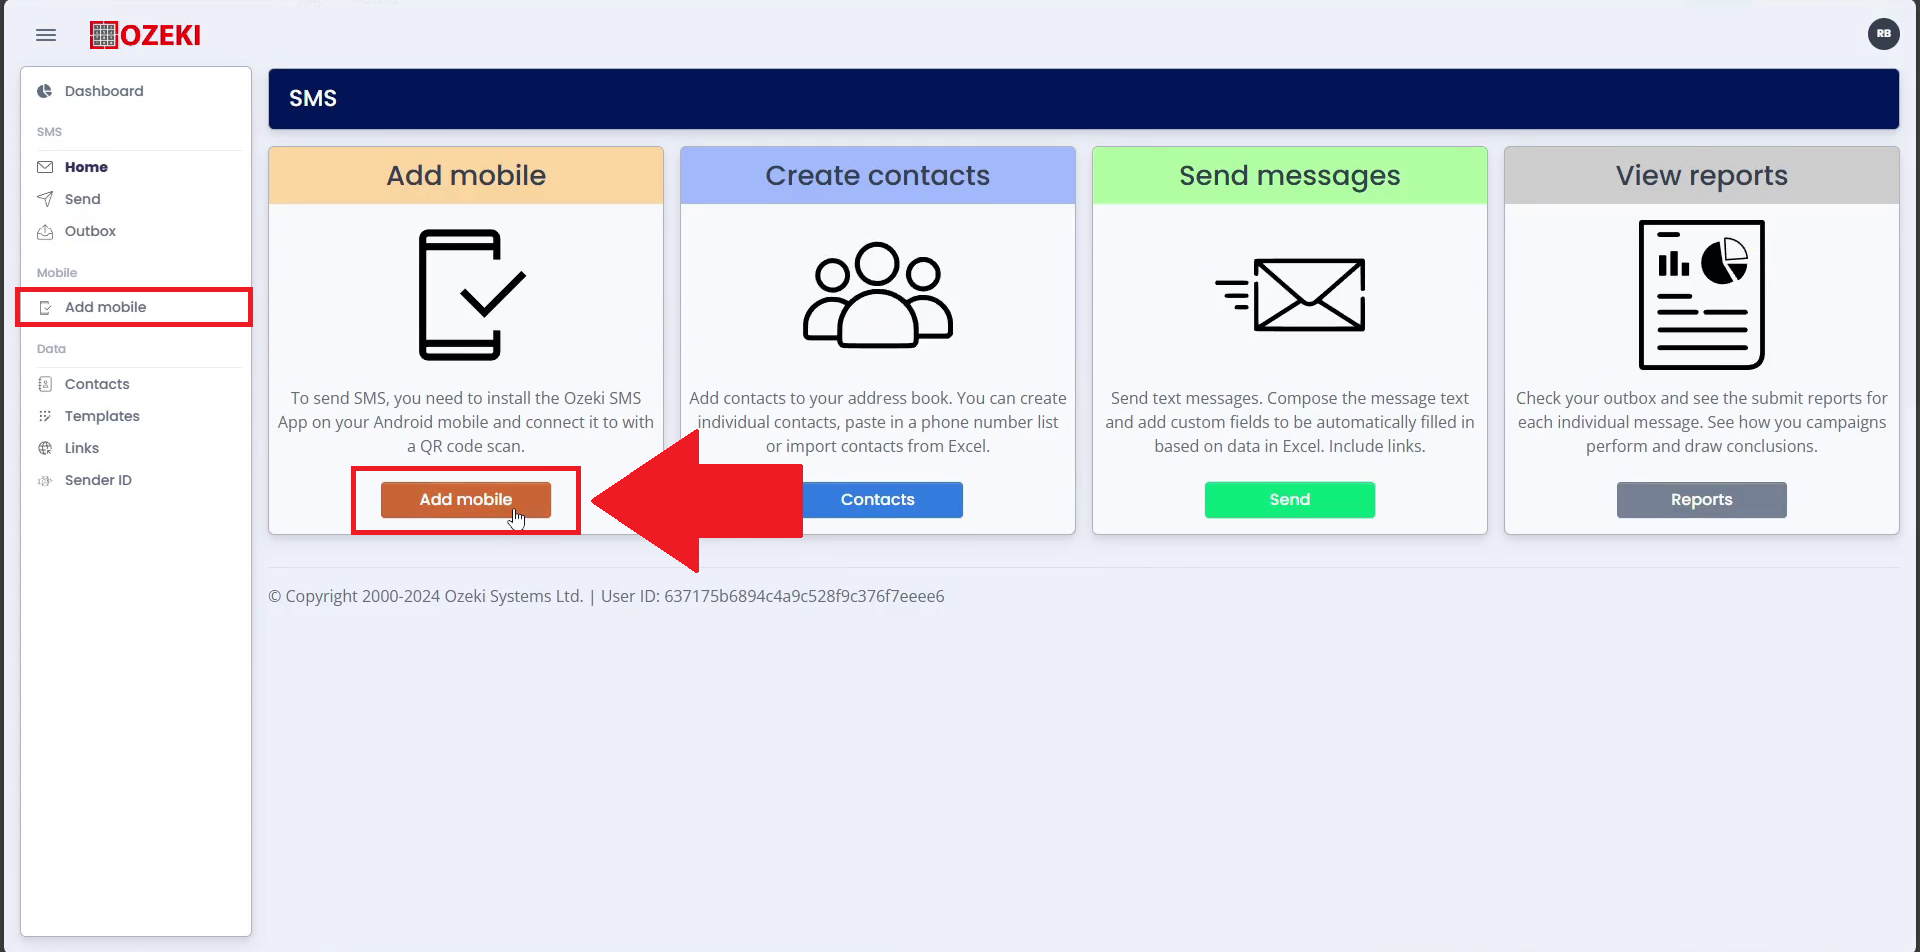
Step 4 - Open the Add Mobile page
To add your mobile device to the SMS campaign as the sender, you will need to open the Add Mobile page in the SMS service.
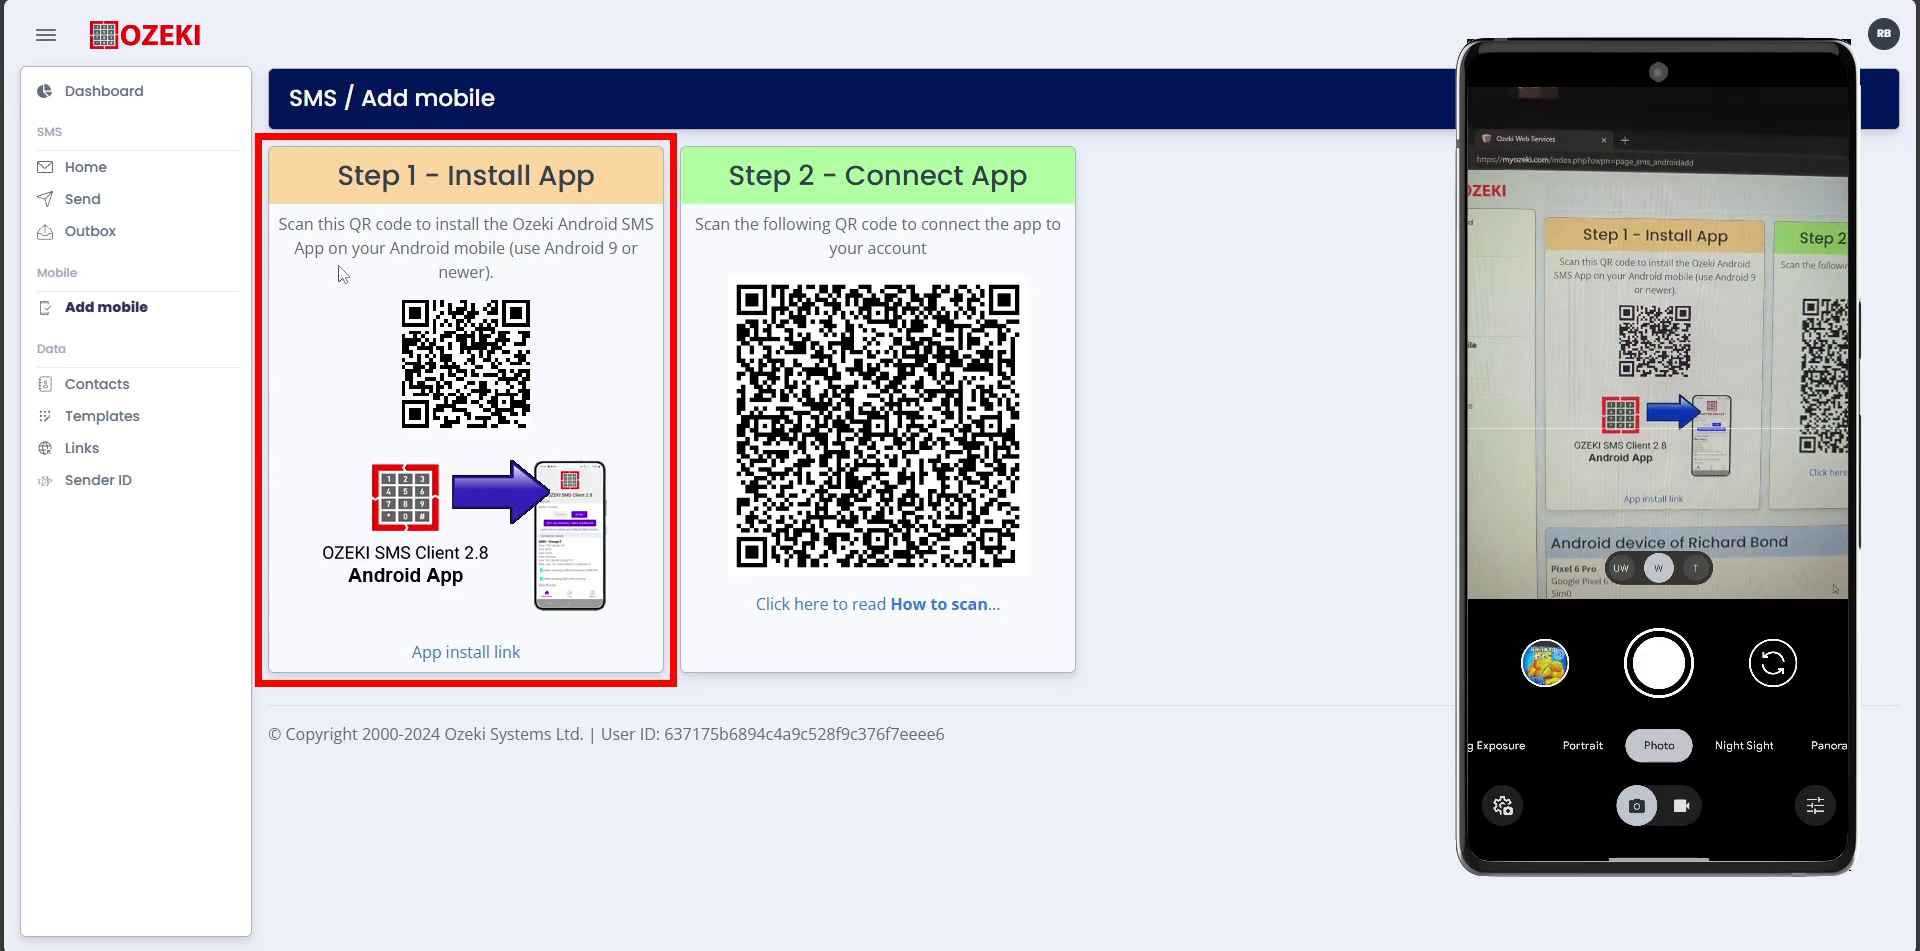
Step 5 - Scan the Download QR Code
You will need to download the Ozeki SMS Client, the easiest way is to scan the QR code from this page or the Add Mobile page.
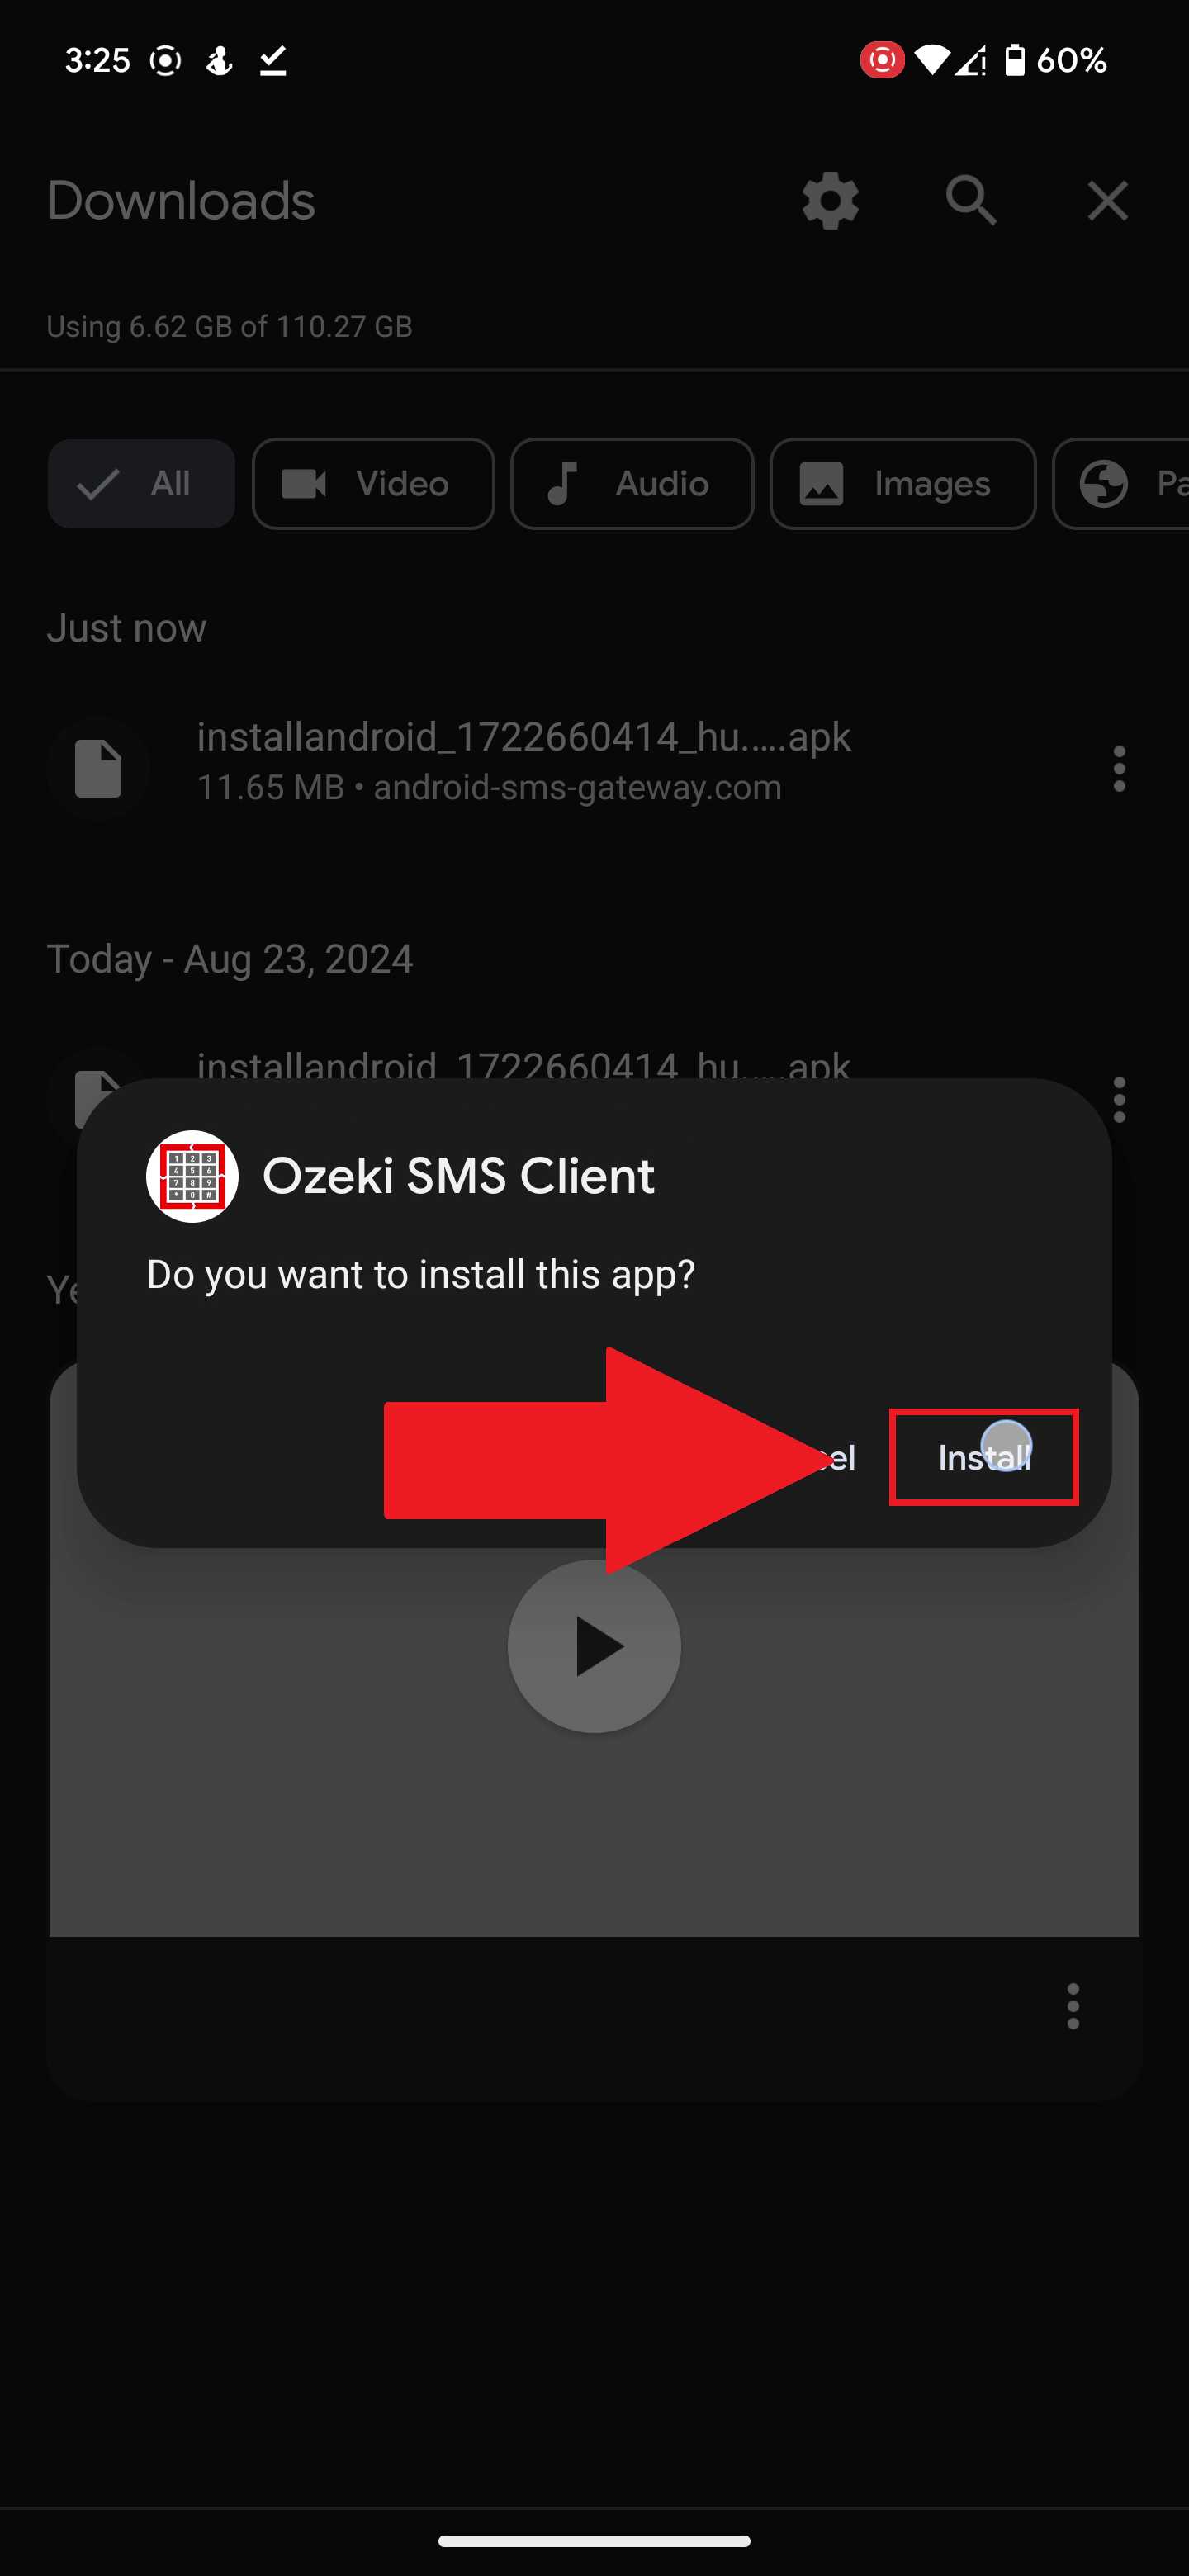
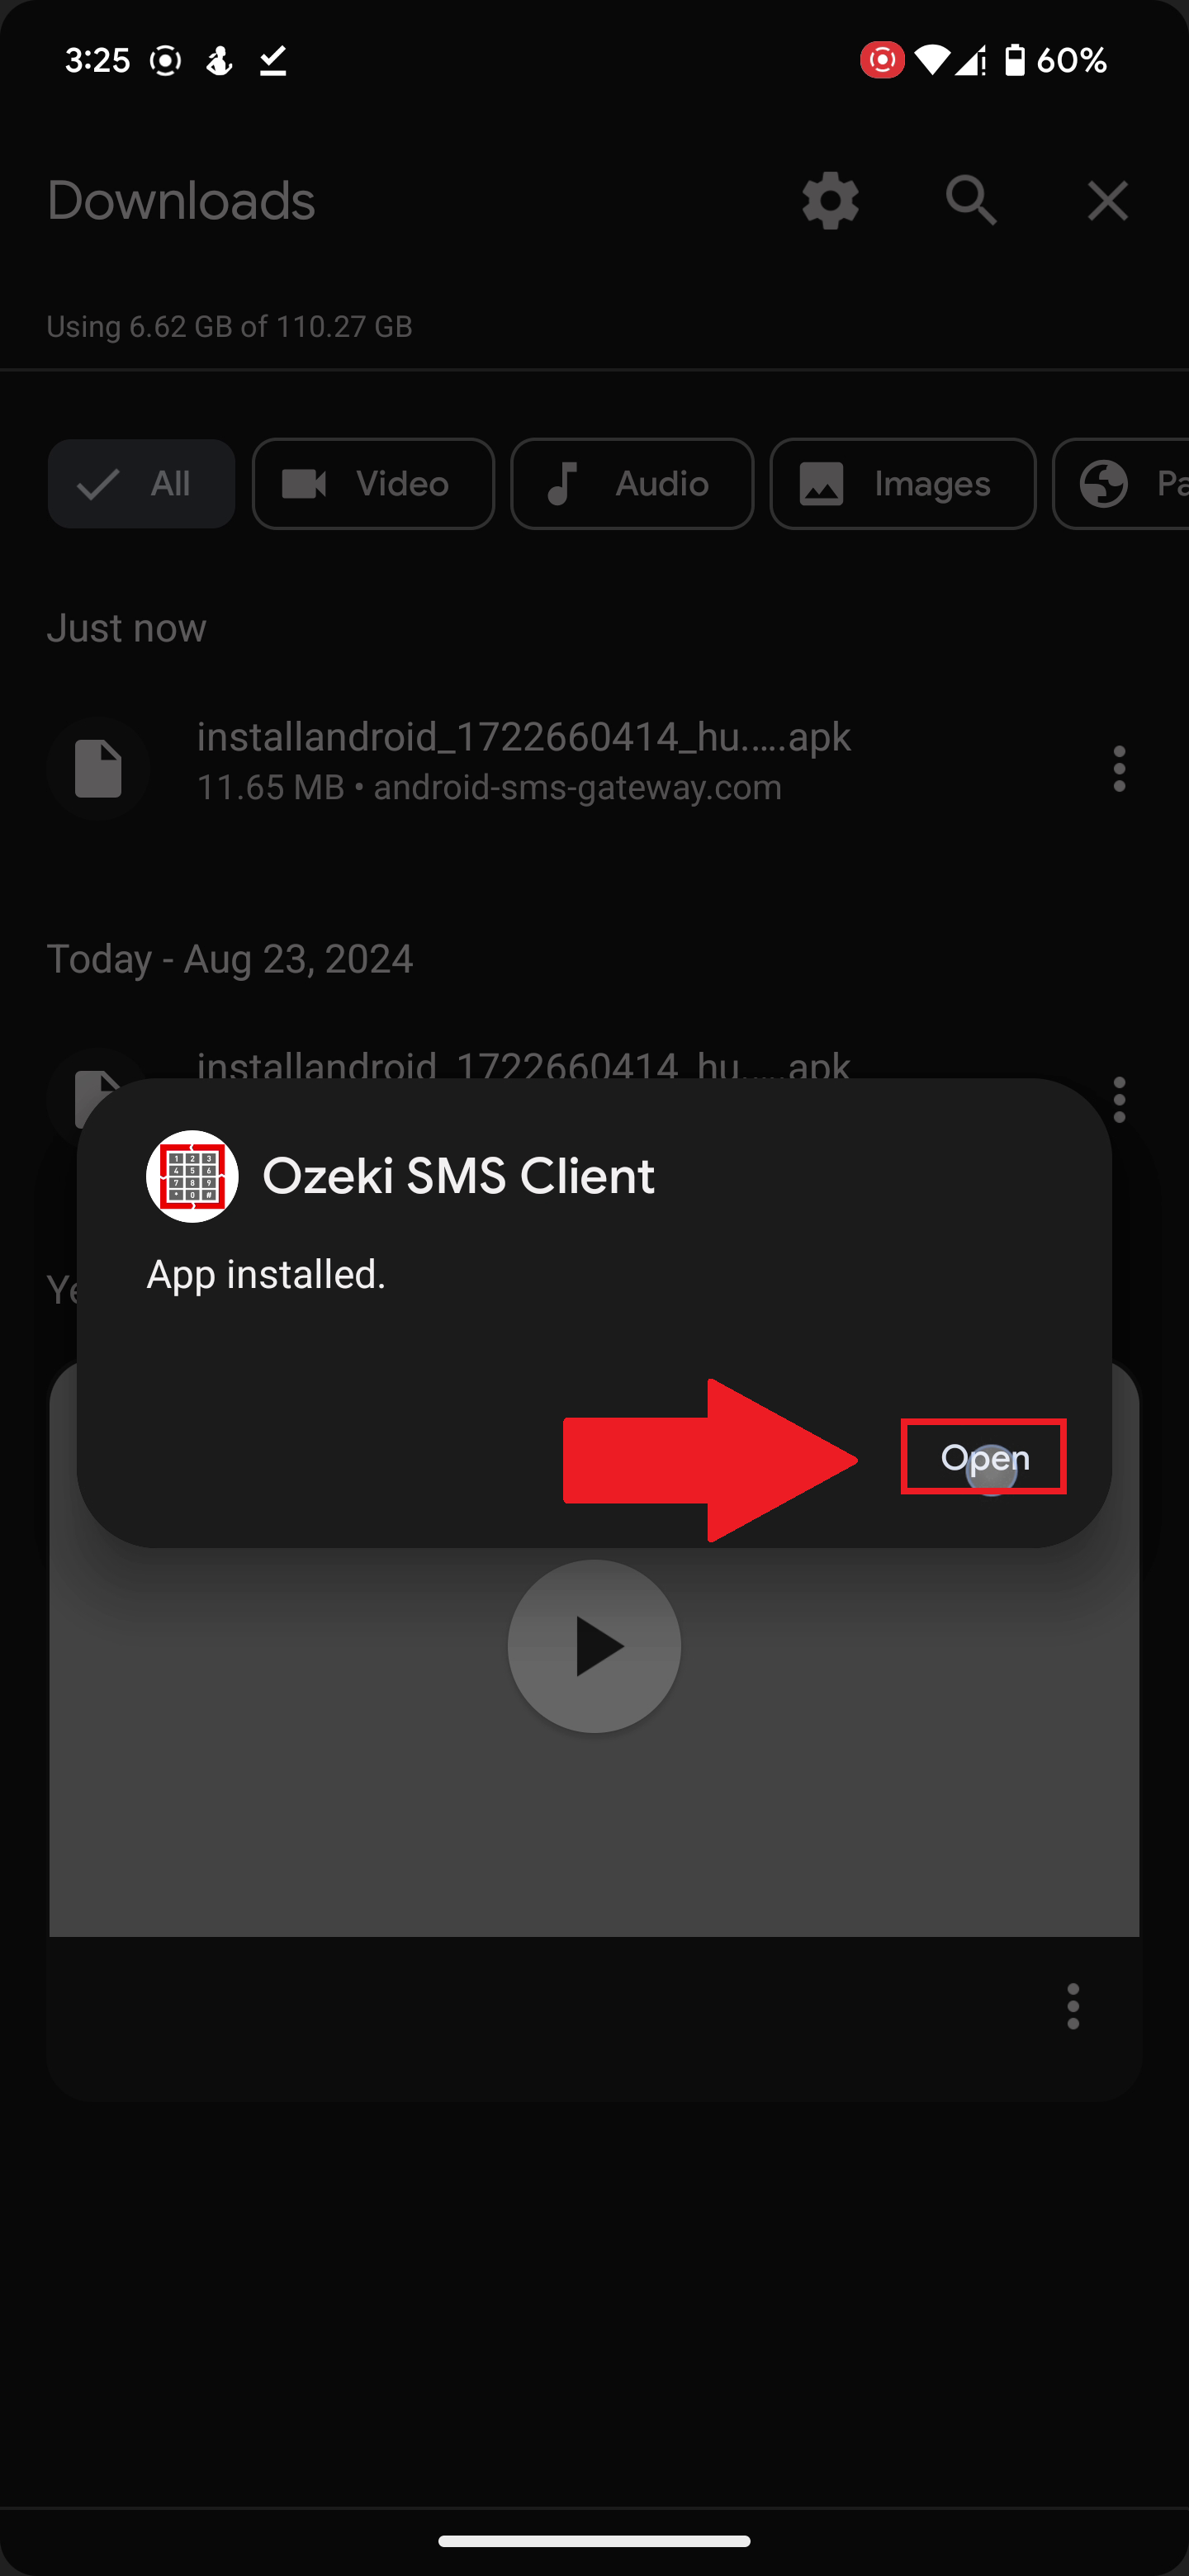
Step 6 - Install the app on your mobile
Once the application downloaded, install it to be able to open it.
Step 7 - Open the installed app
Once you have installed the app, open it to continue with the tutorial.
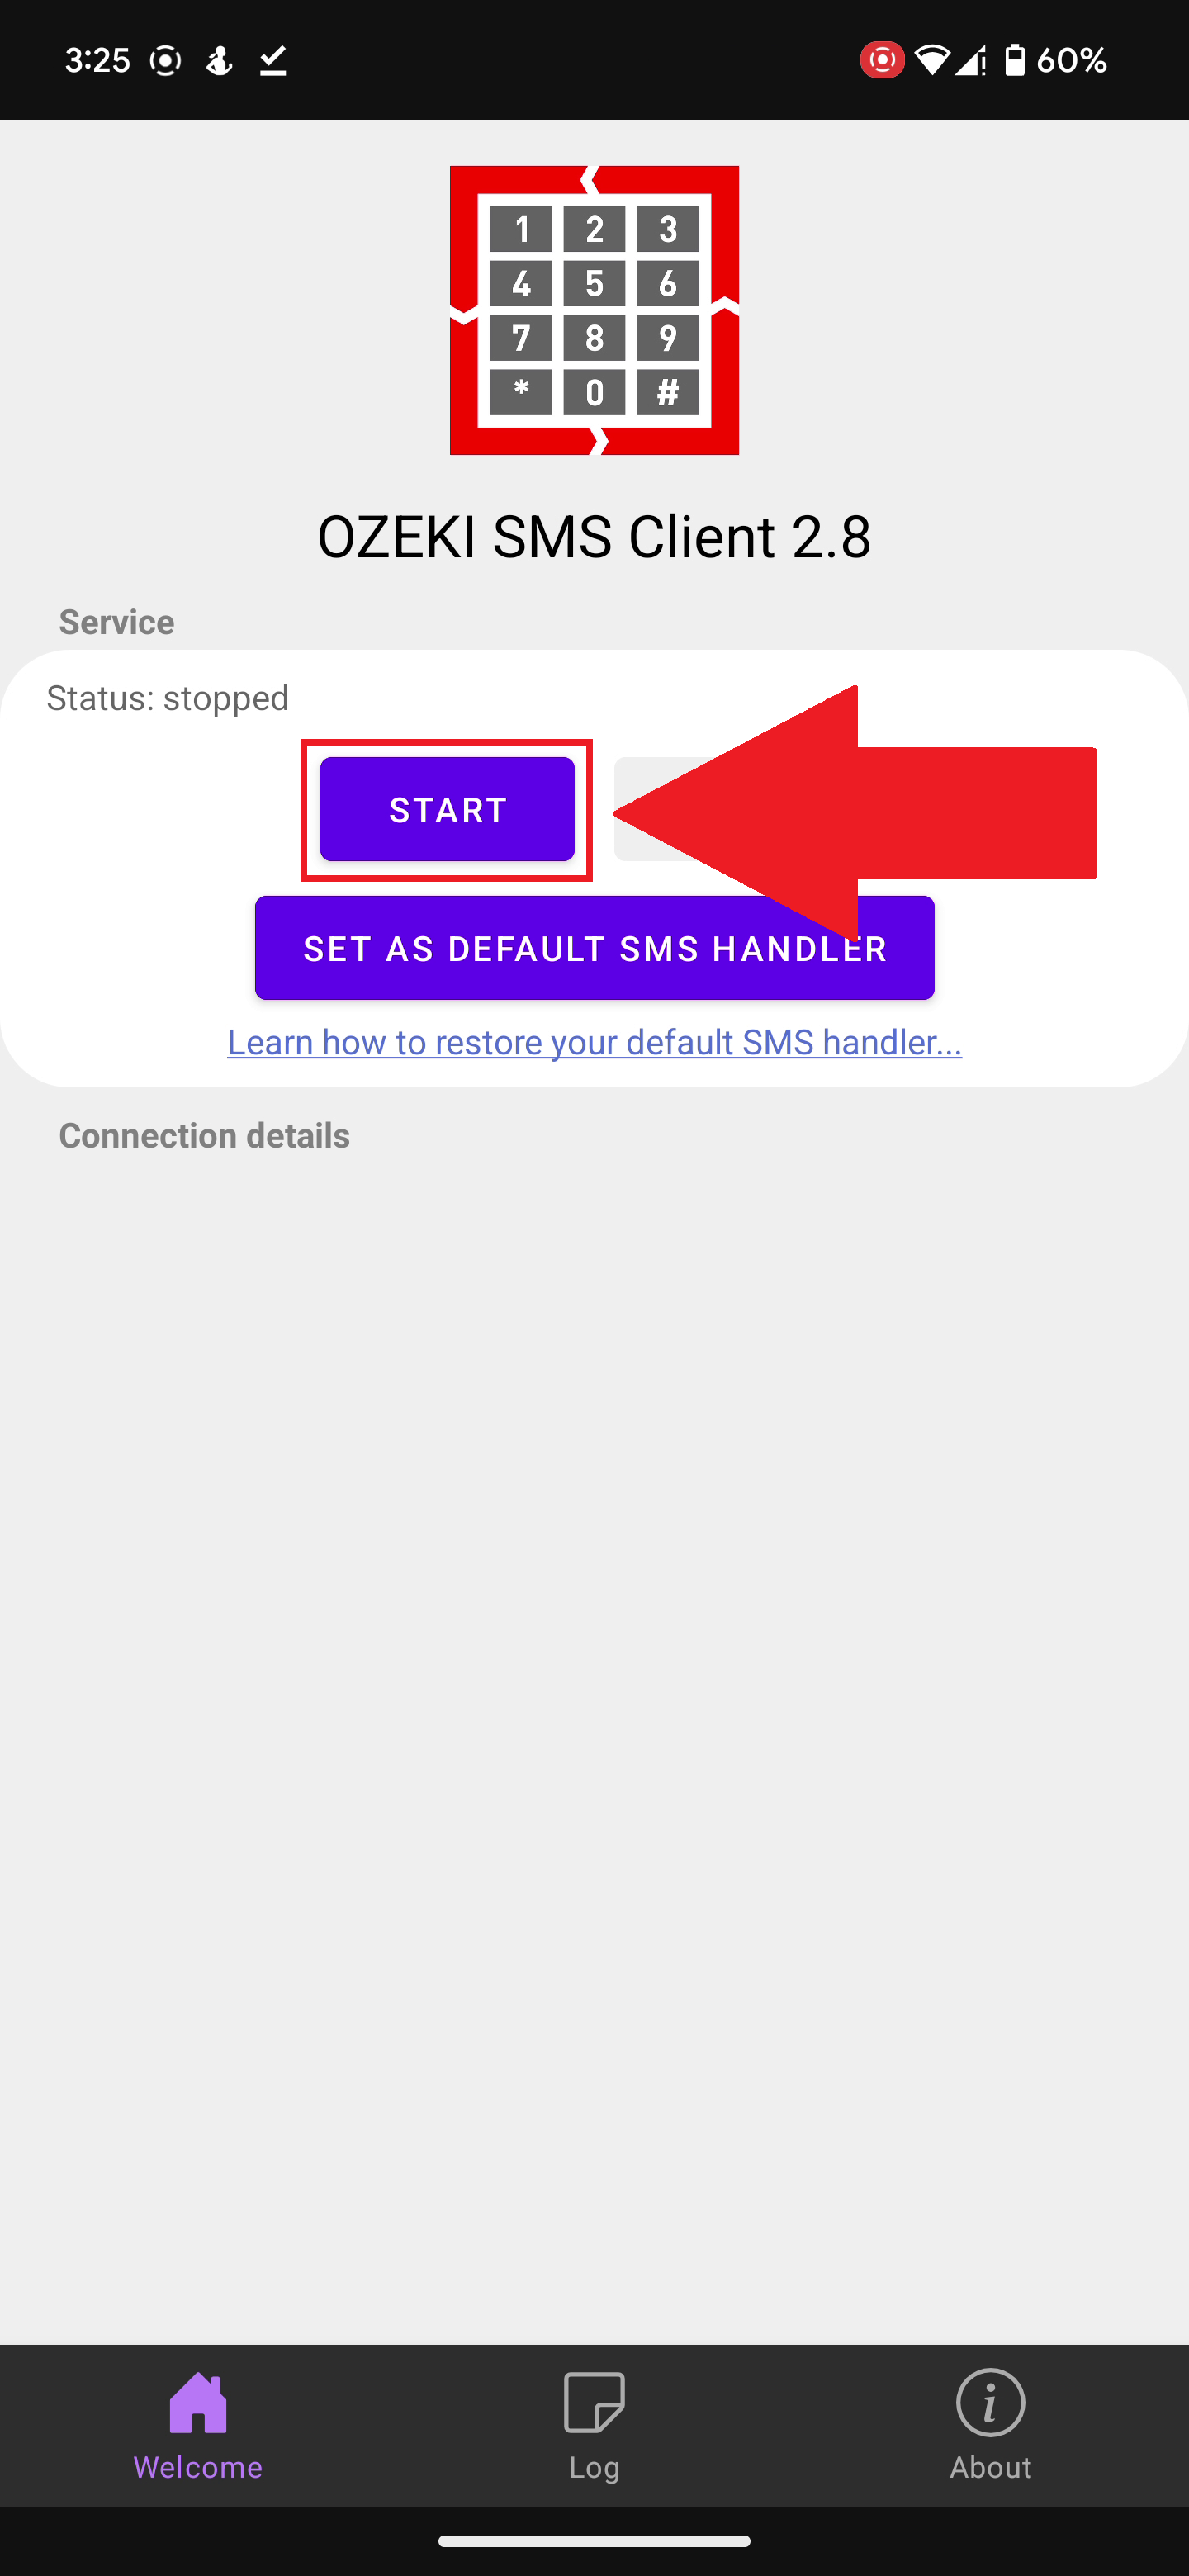
Step 8 - Start the Ozeki SMS Client Service
To connect your phone with MyOzeki, you need to start the Ozeki SMS Client service from the application you downloaded in the previous step.
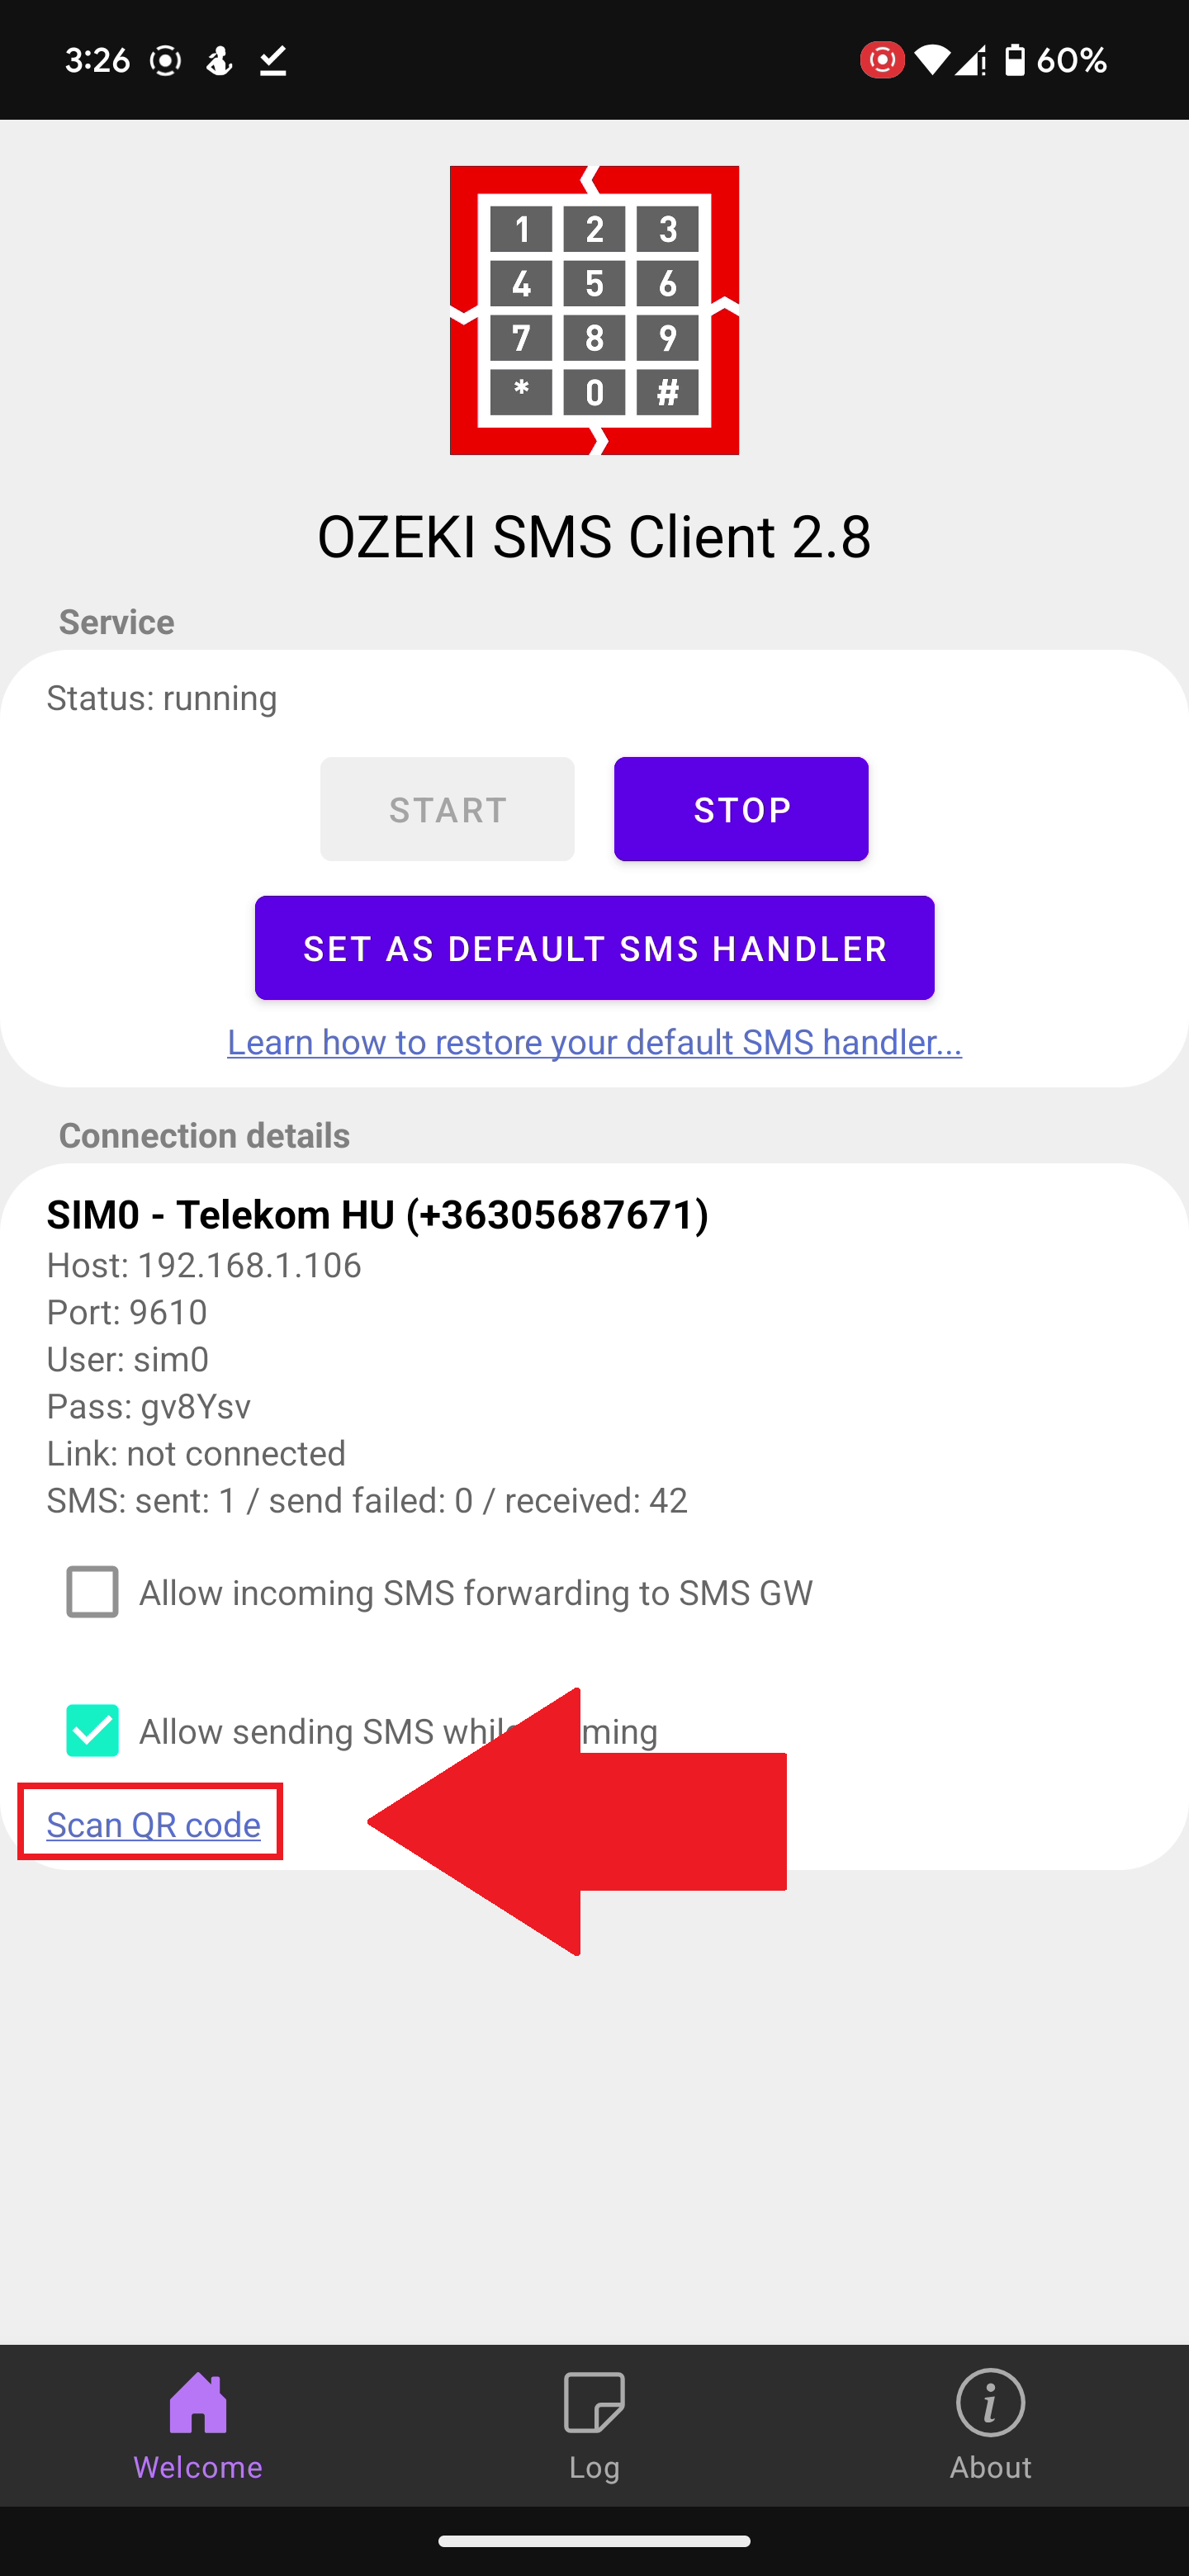
Step 9 - Click on the Scan QR code button
In the Ozeki SMS Client, after starting the service you can find a button to scan a QR code. Click on it to continue with the next step.
Step 10 - Connect phone with QR code
Scan the second QR code on the Add mobile page with the Ozeki SMS Client application. This step should connect the phone to MyOzeki as an SMS Client.
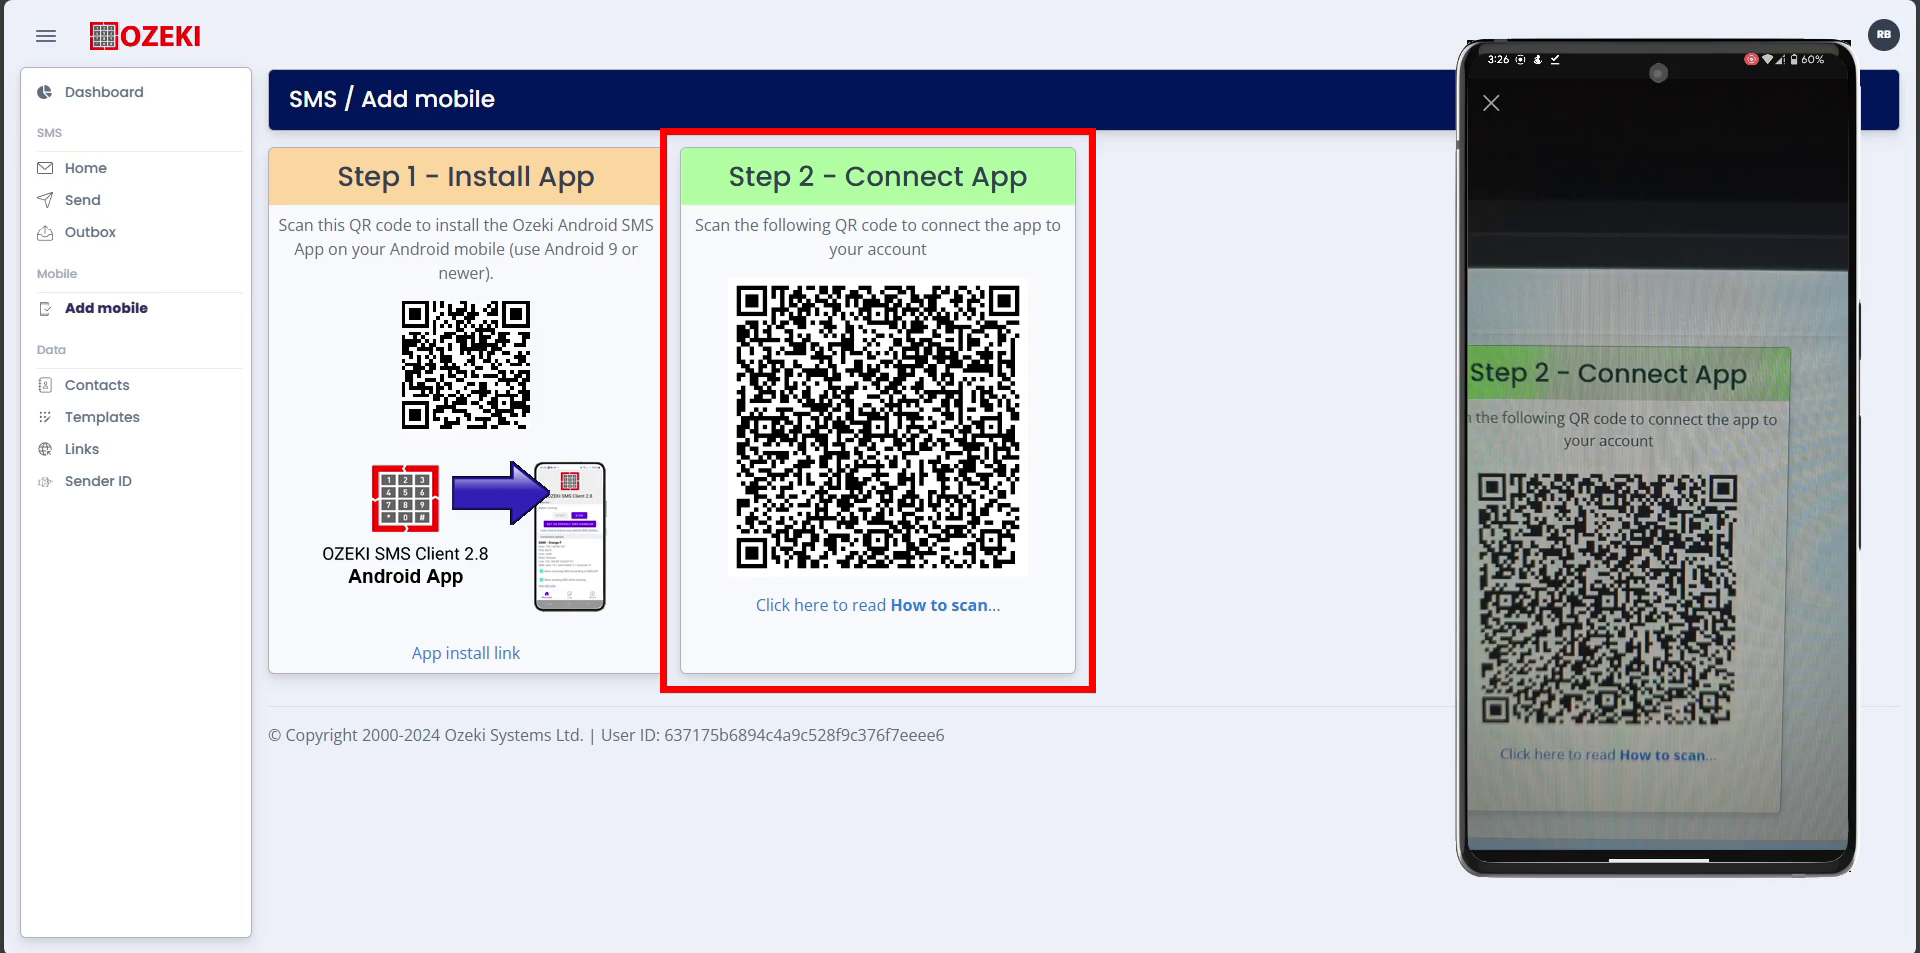
Step 11 - Check your connection
After all these steps, you need to check if the connection was succesful, in MyOzeki, refresh your page to see if your phone shows up at the bottom of the Add mobile page. On your phone, look for the text "Connected" in the Ozeki SMS Client app.

Video Tutorial
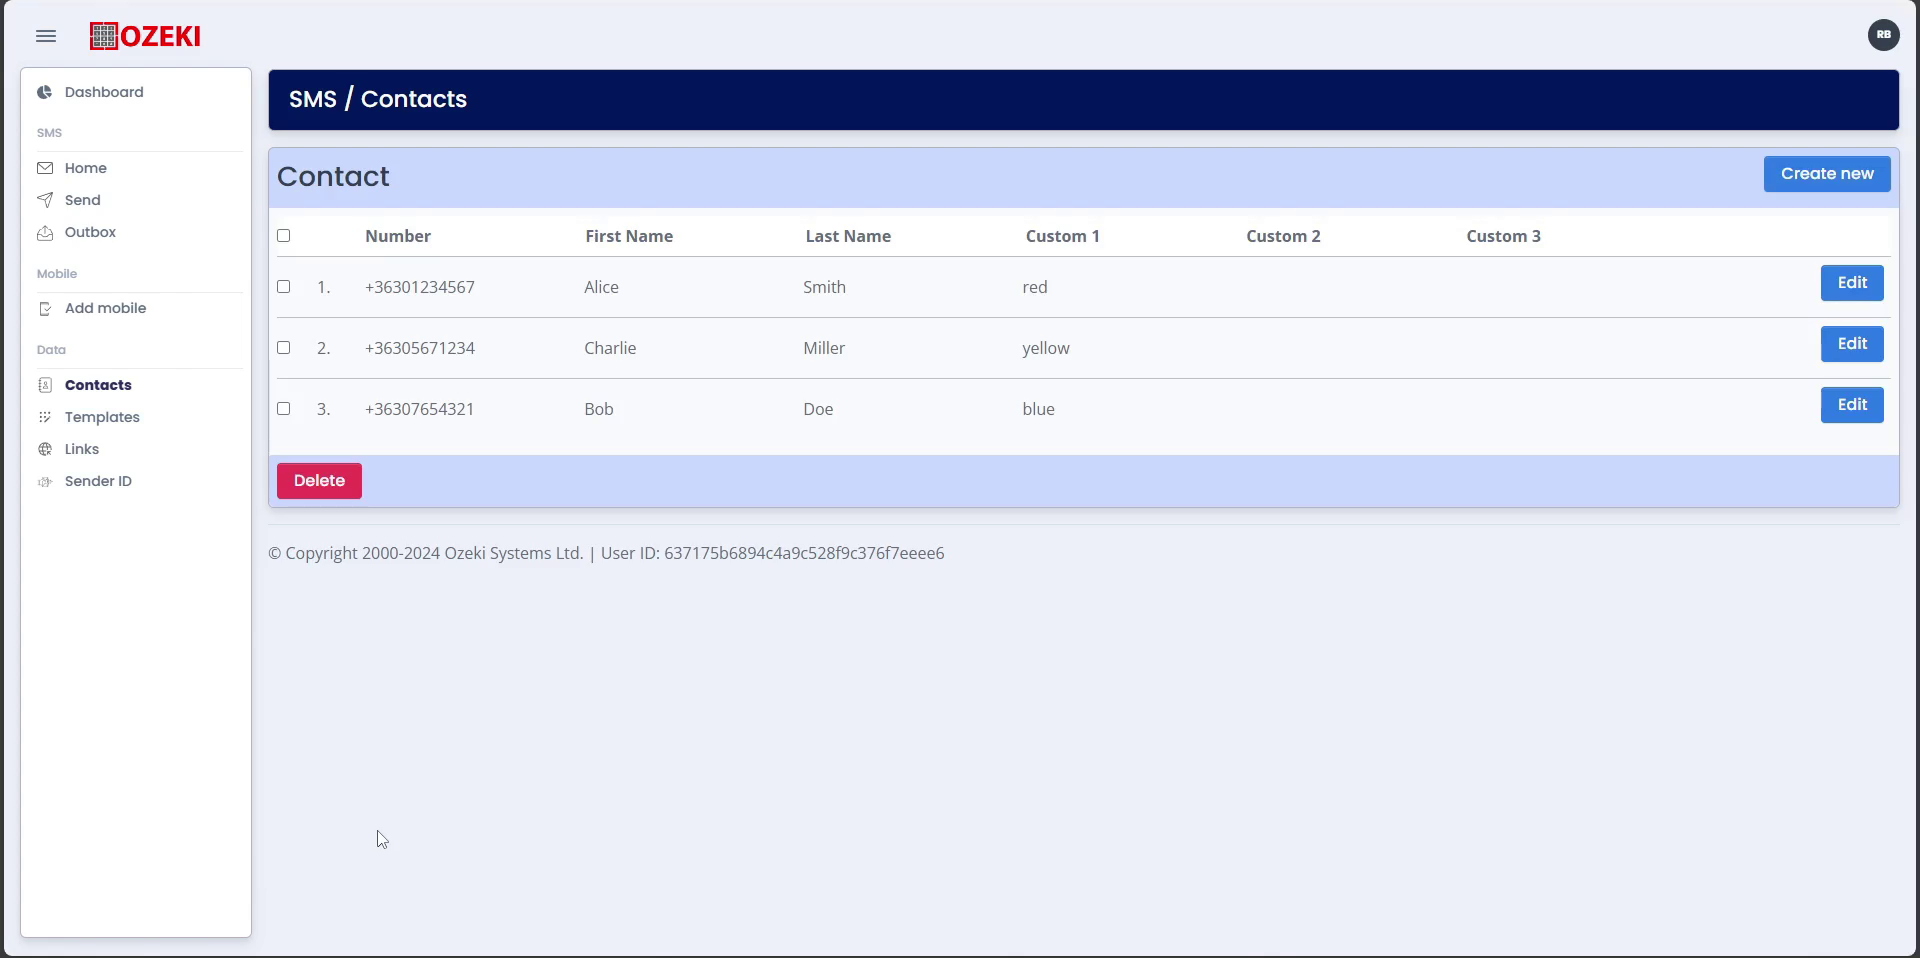
Step 12 - Create new contacts for your SMS campaign
Open the Create contacts page to start creating new contacts to send out your SMS campaign to. The people you add will receive your SMS campaign if you select them during sending.
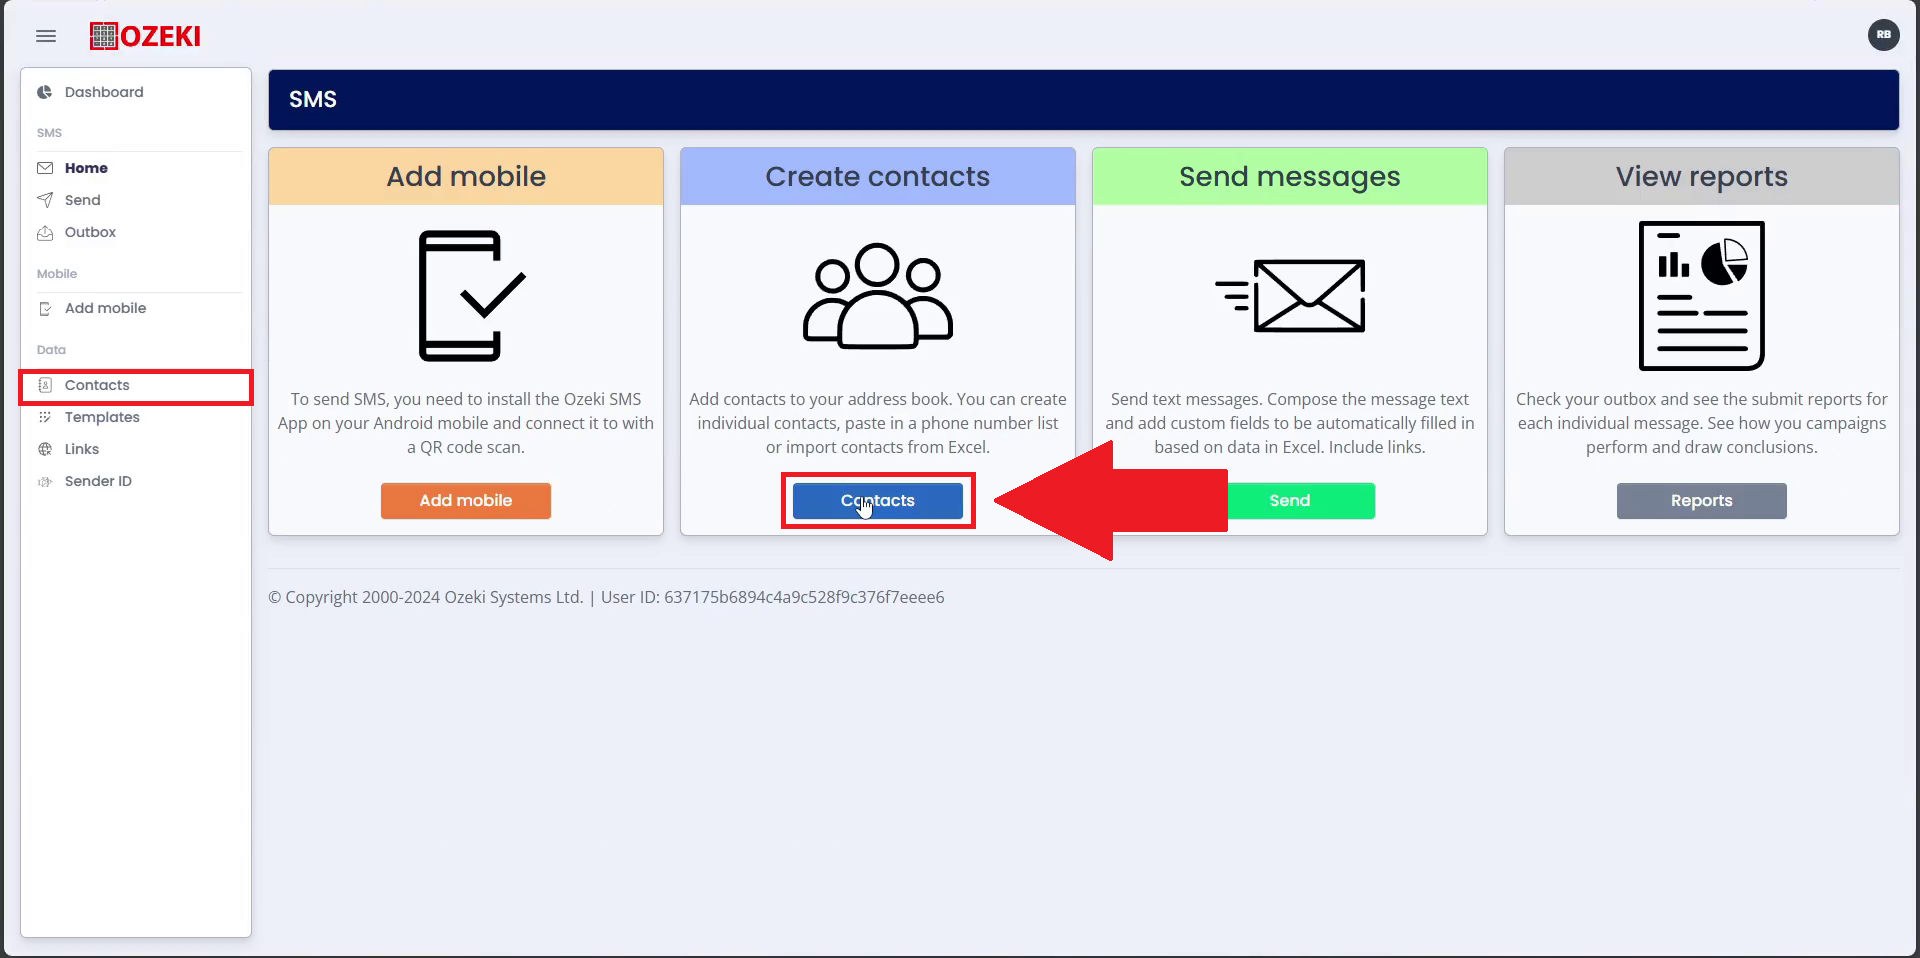
Step 13 - Click on the Create new button
Start creating your new Contact by clicking the blue "Create new" button in the top right of the page.
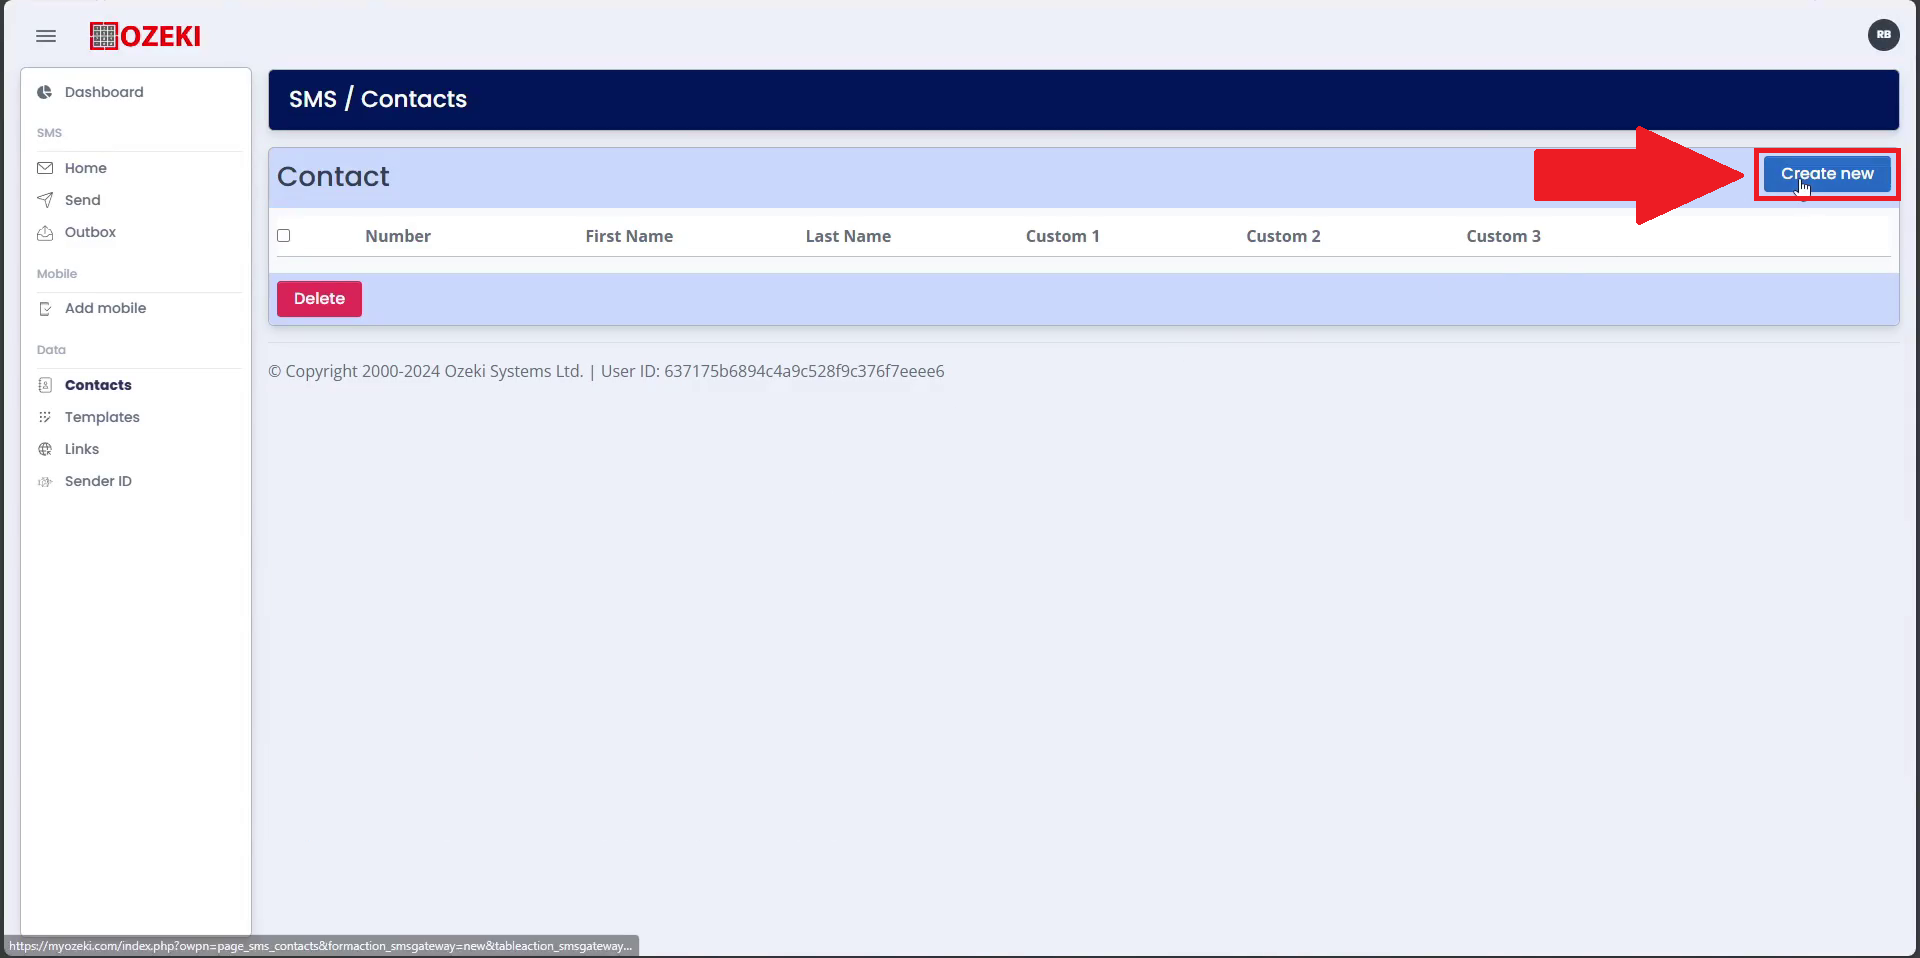
Step 14 - Enter details and save your contact
Enter your details for the contact, like their name, phone number and Custom Values. Use custom values to store common things between your contacts. For example, if you have data of their favourite flowers, add that to Custom 1. We used the contacts favourite color.
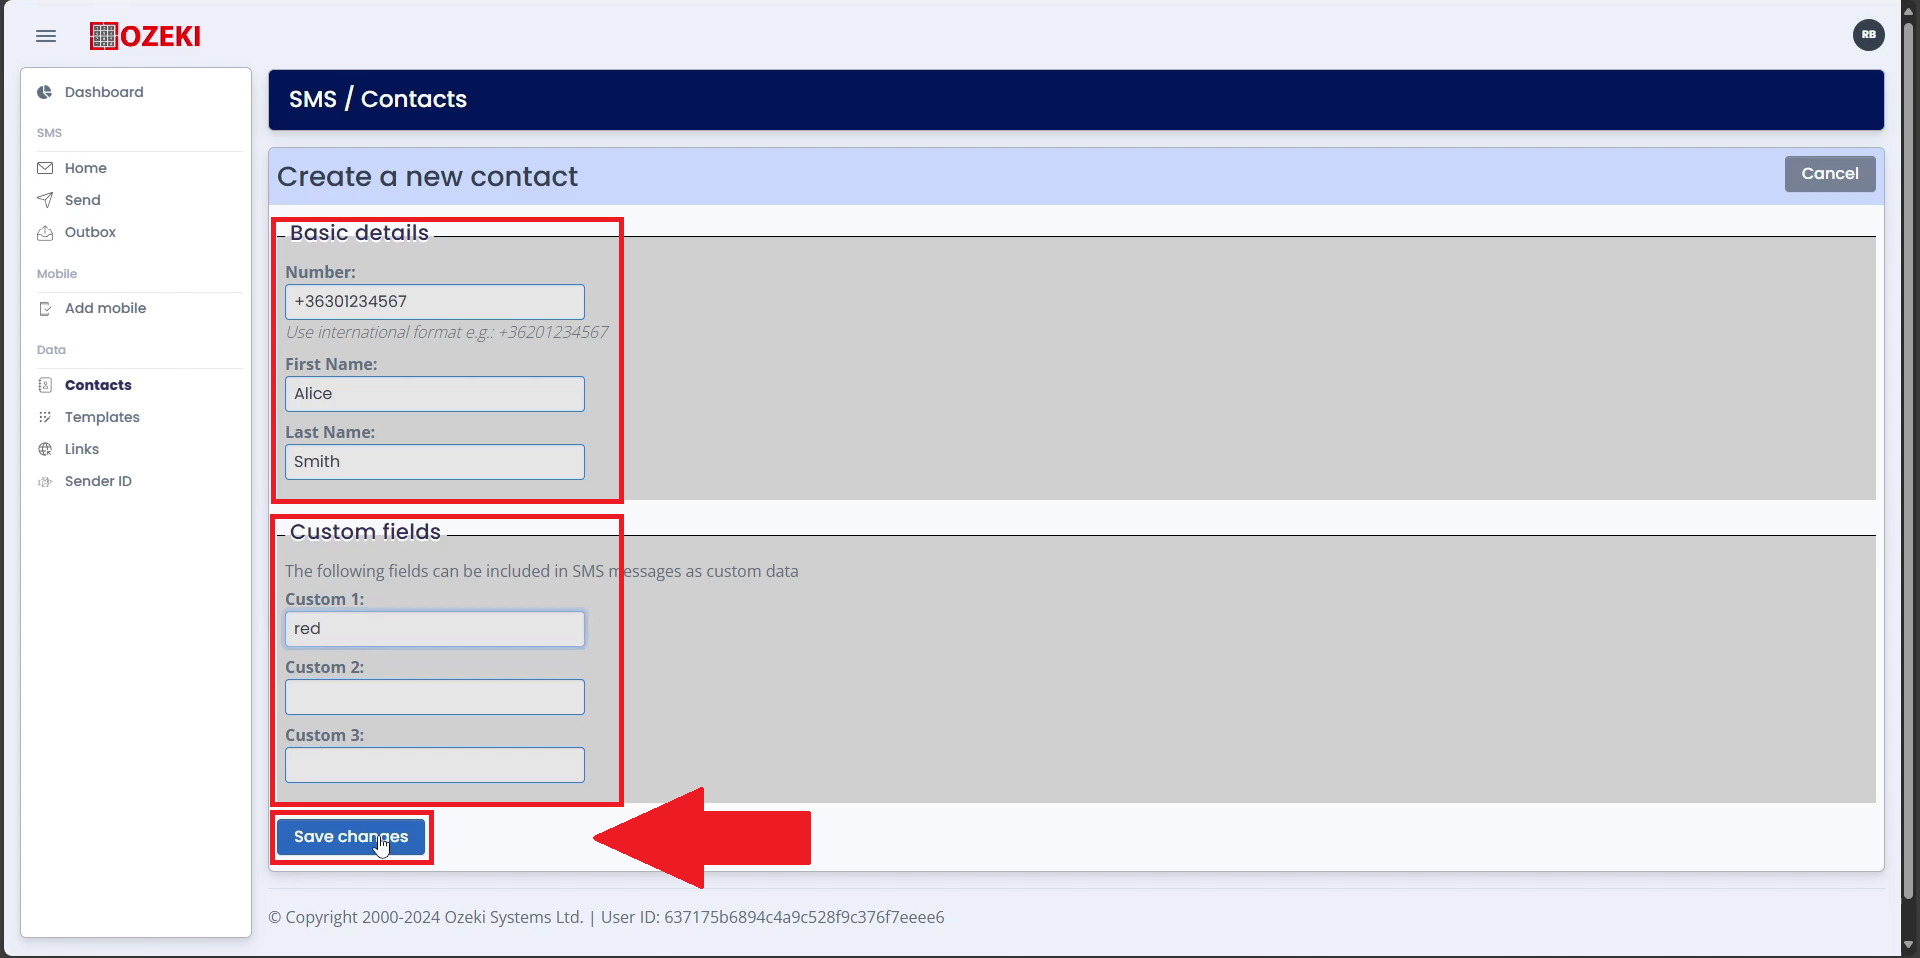
Step 15 - Check your contacts for errors
Once you finish adding contacts, check if every detail is correctly set. Pay extra attention to their phone number and name.
Video Tutorial
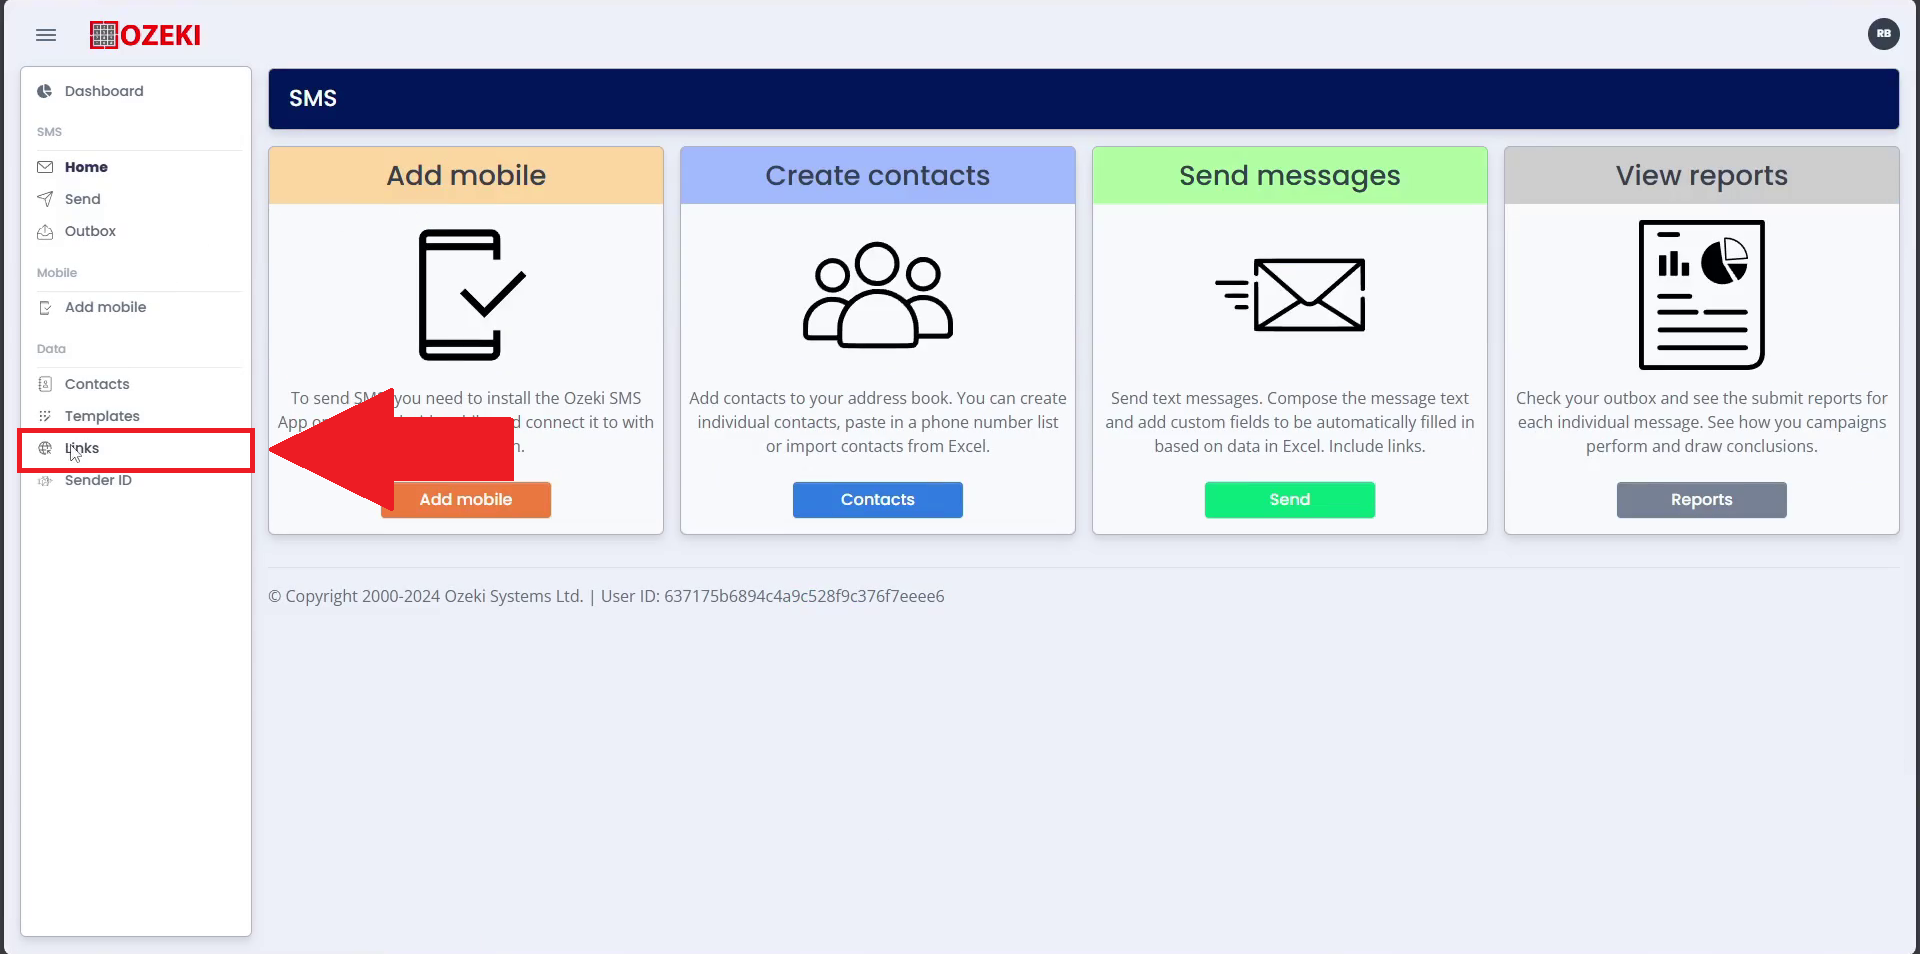
Step 16 - Create your company link
To create your company link that you can use in your campaign SMS, head over to the links page which can be found on the left inside the navbar.
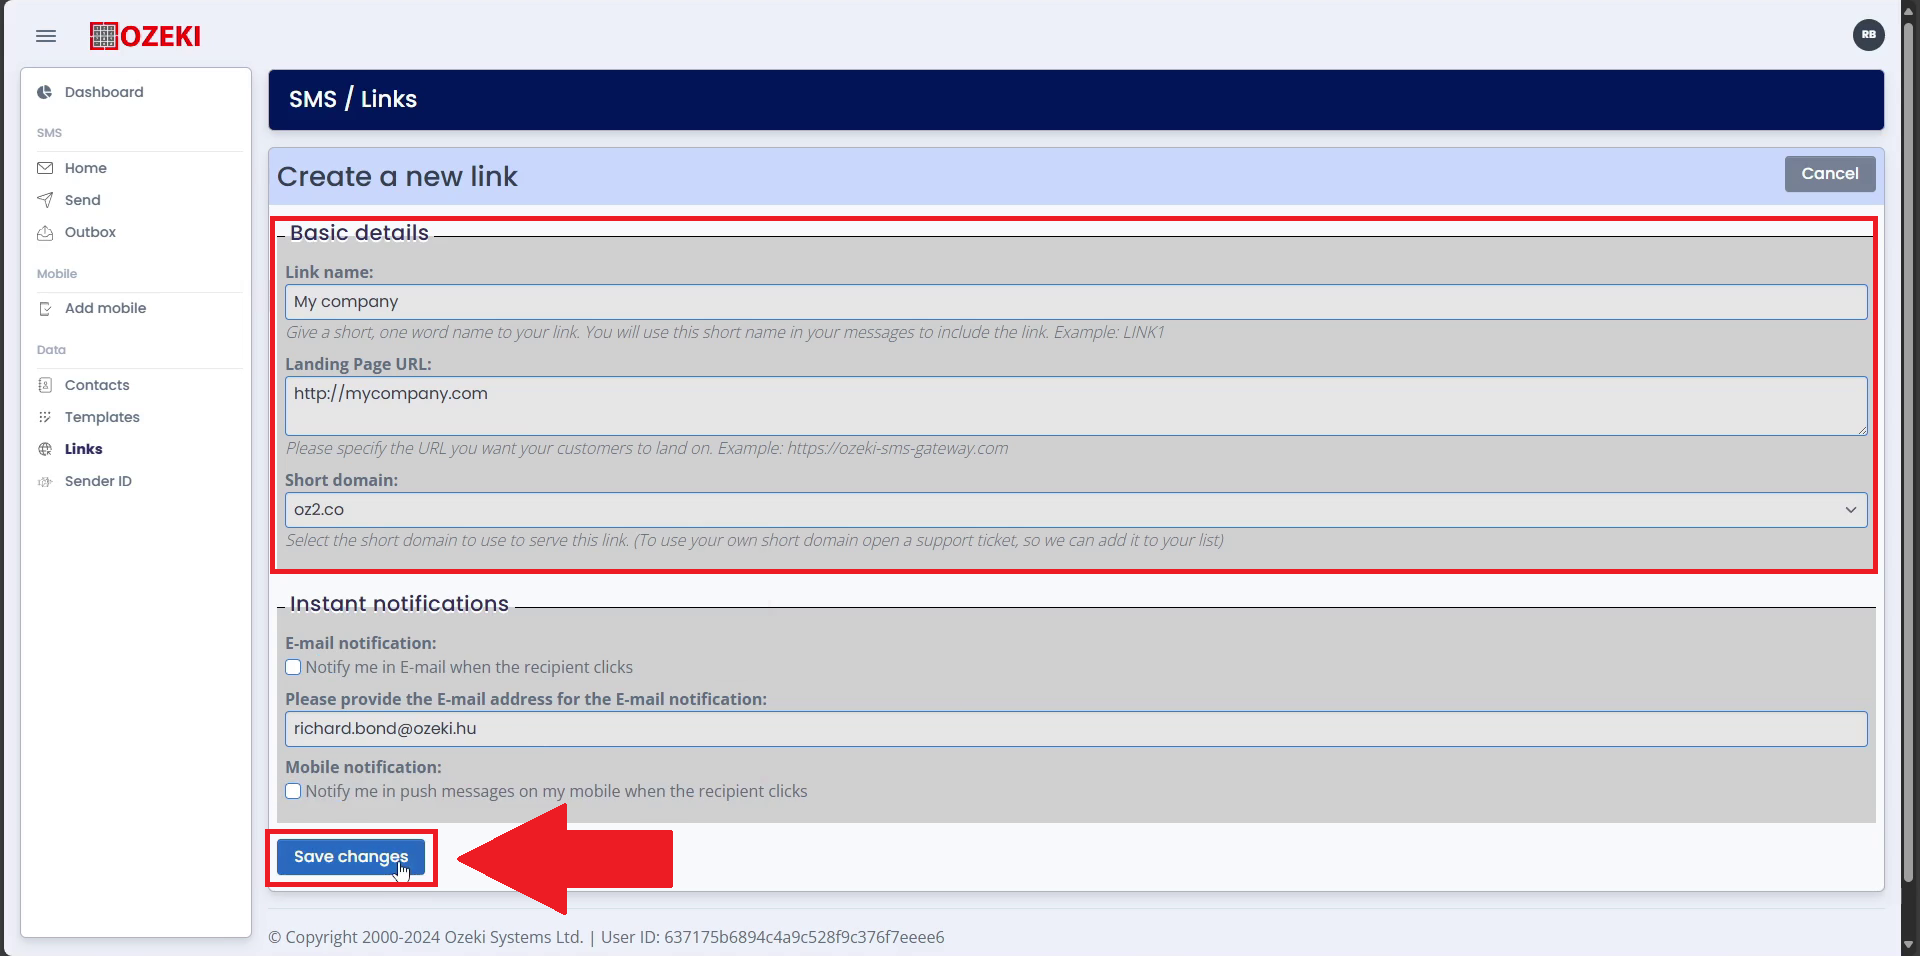
Step 17 - Create a new Link
Click on the blue "Create new" button in the top right corner of the page to start creating your Link to your website.

Step 18 - Enter Details and Save Link
Enter your details into the form like your Link name, URL and the preferred domain to use. You can also set notifications for when someone opens your links.
Video Tutorial
Step 19 - Send out your SMS campaign
To start the final part of sending out your SMS campaign by opening the "Send" page.
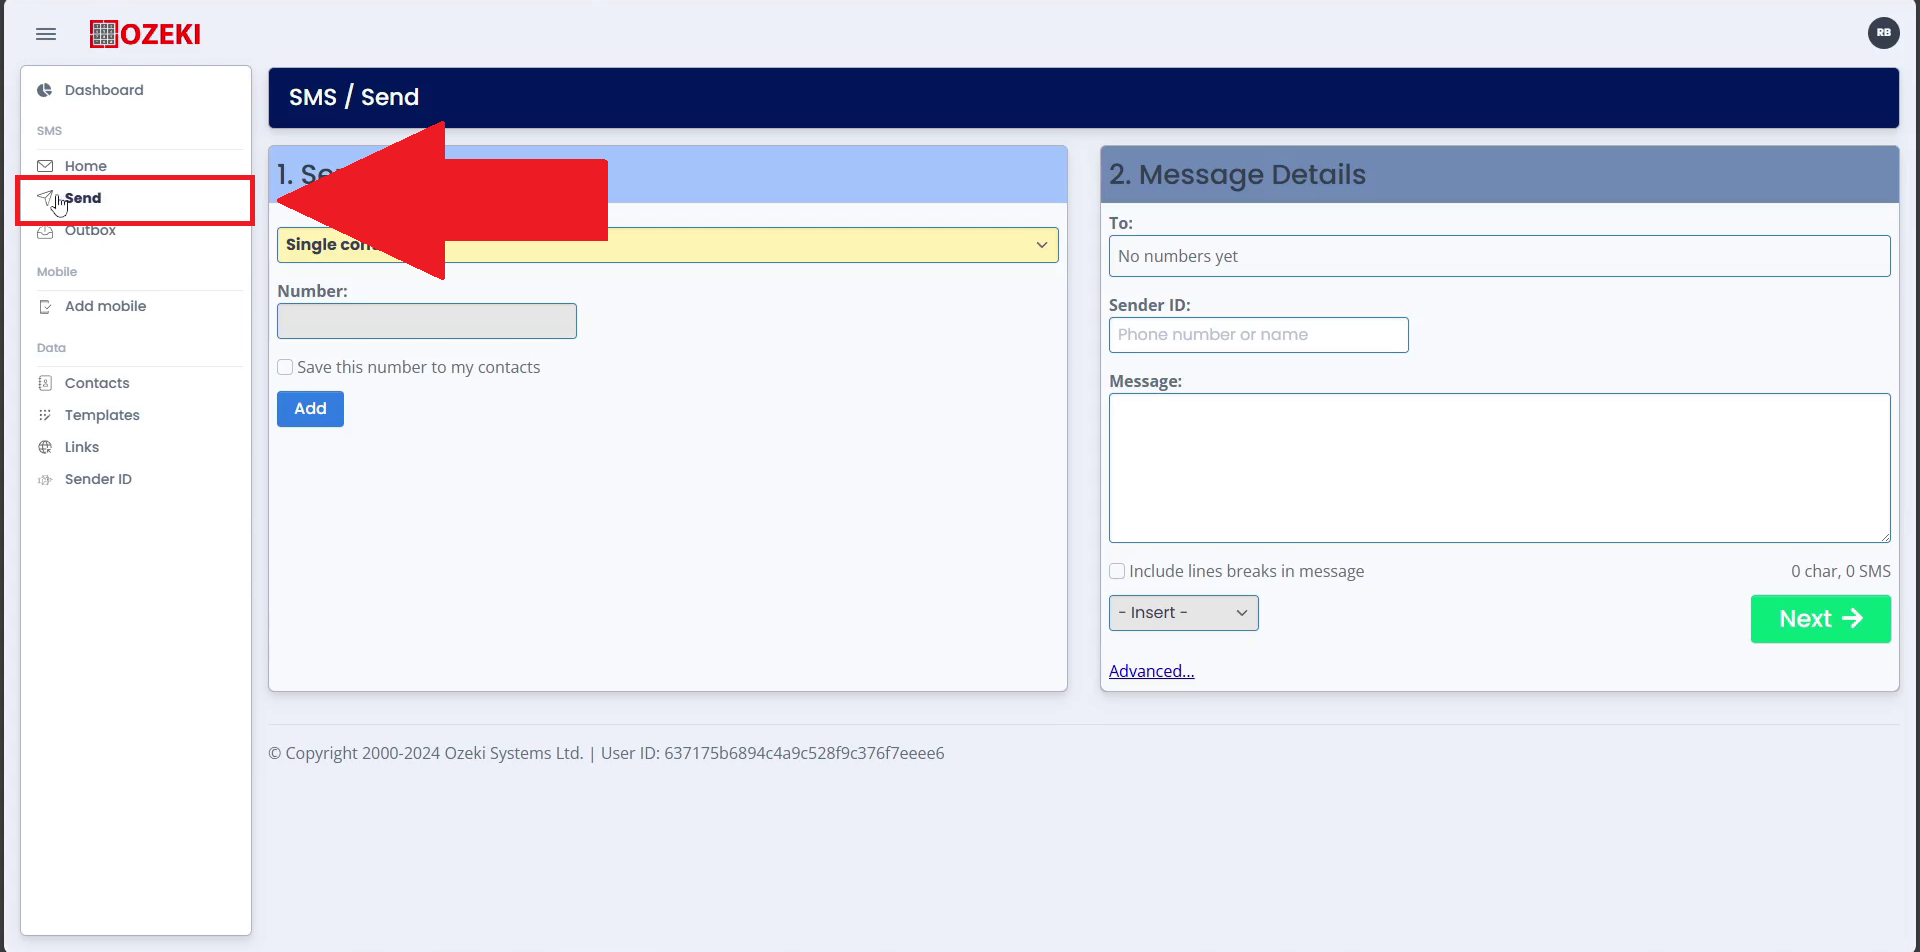
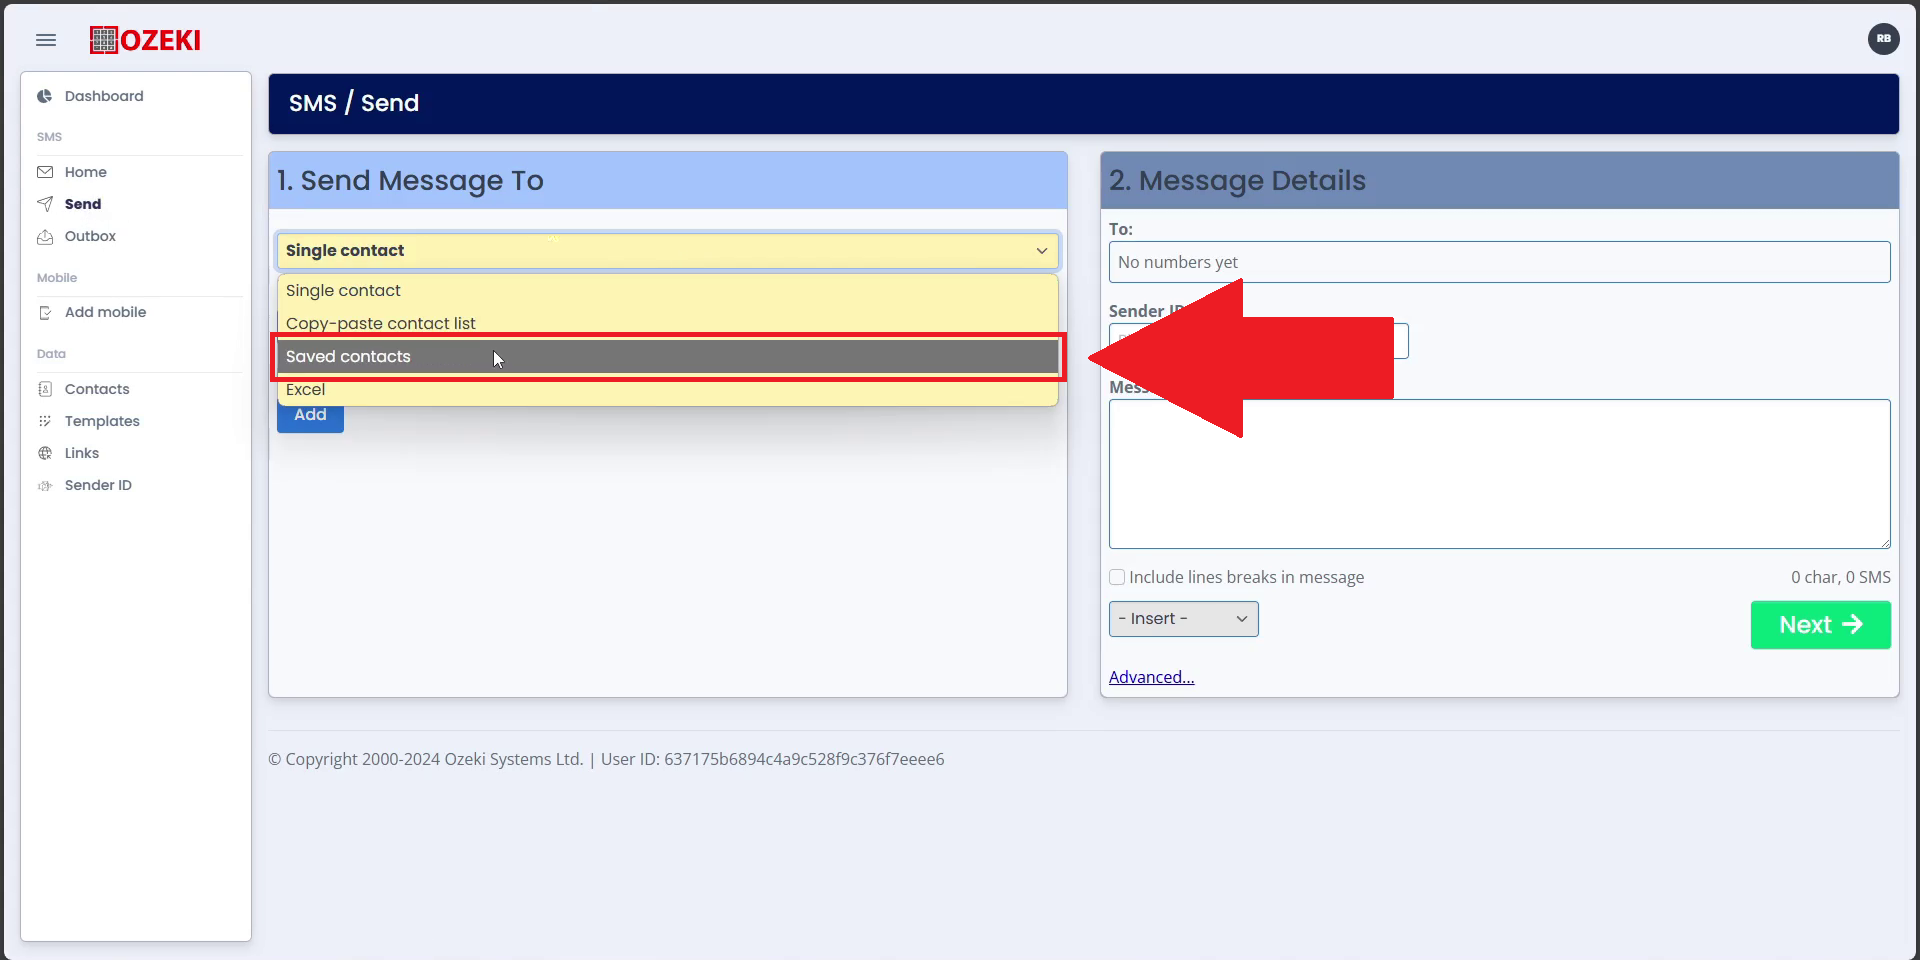
Step 20 - Select your saved contacts
Before you can start selecting the specific people you want to send your campaign to from saved contacts, you have to open the dropdown and select "Saved contacts".
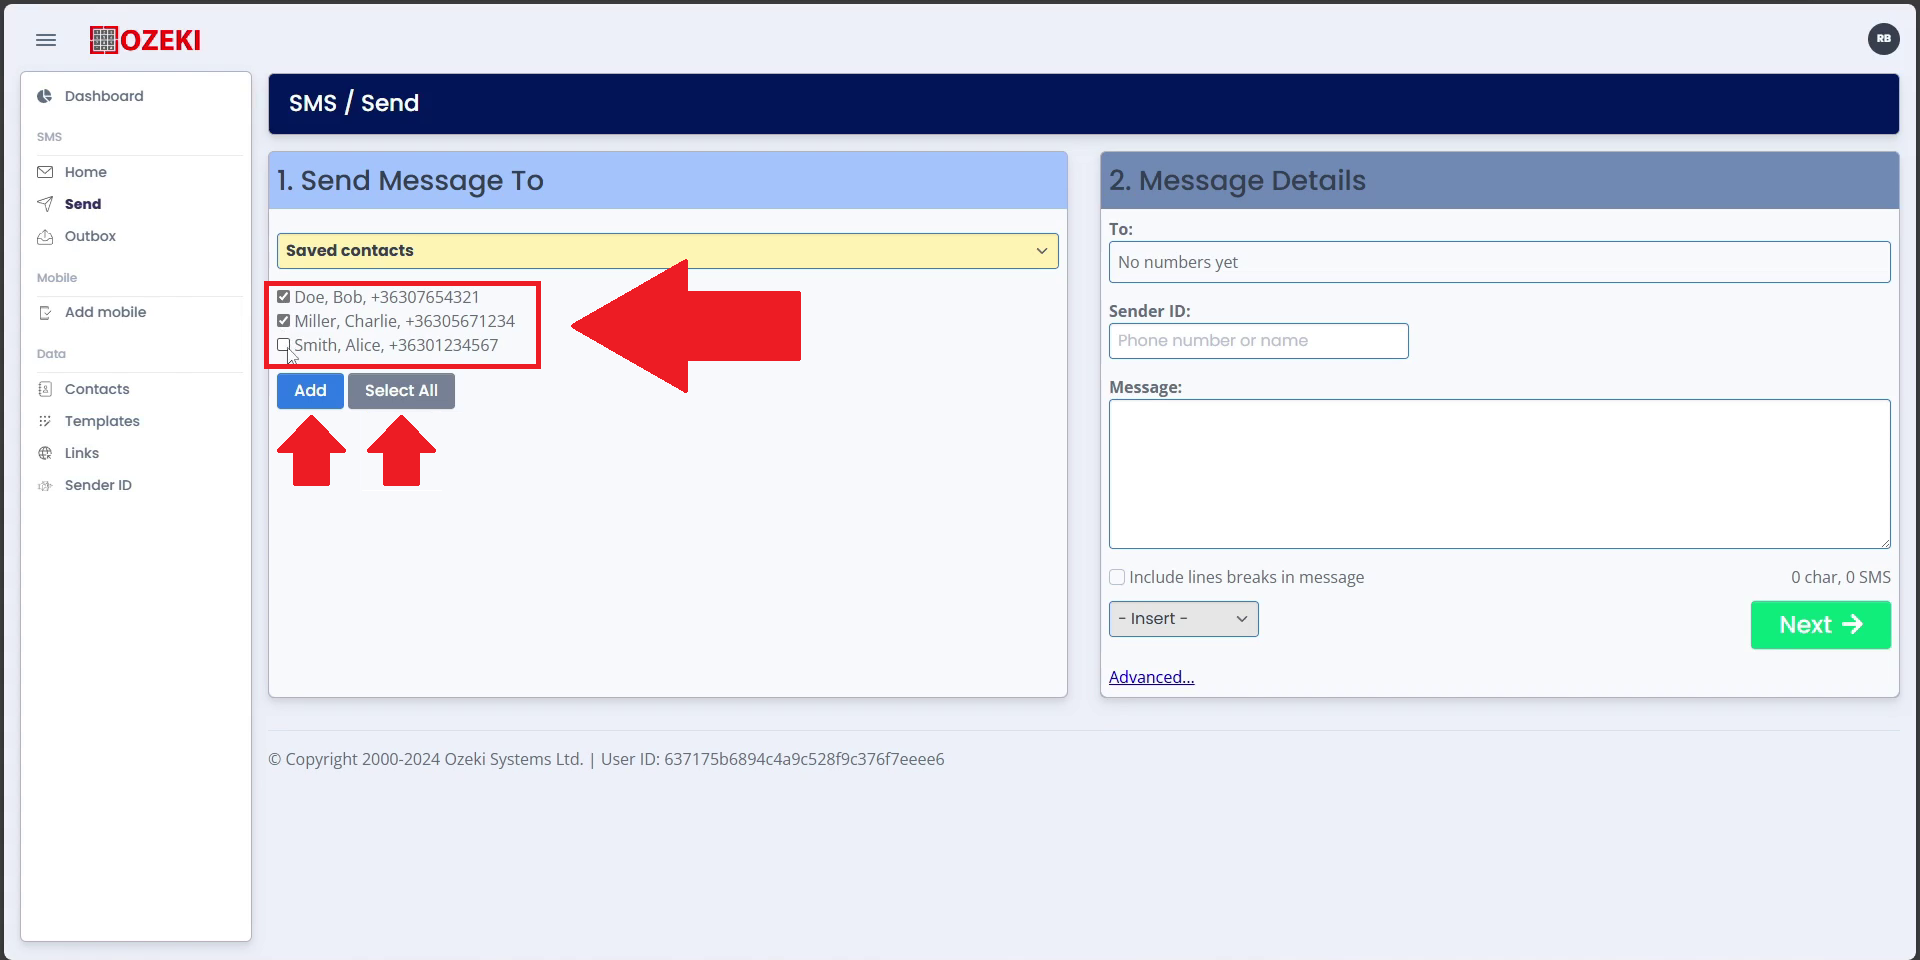
Step 21 - Select the contacts to send out your SMS to
Below the dropdown menu, you can see the Contacts you have created. Select them either by clicking the checkbox next to their name, or use the "Select All" button to send it to all of the Contacts saved.
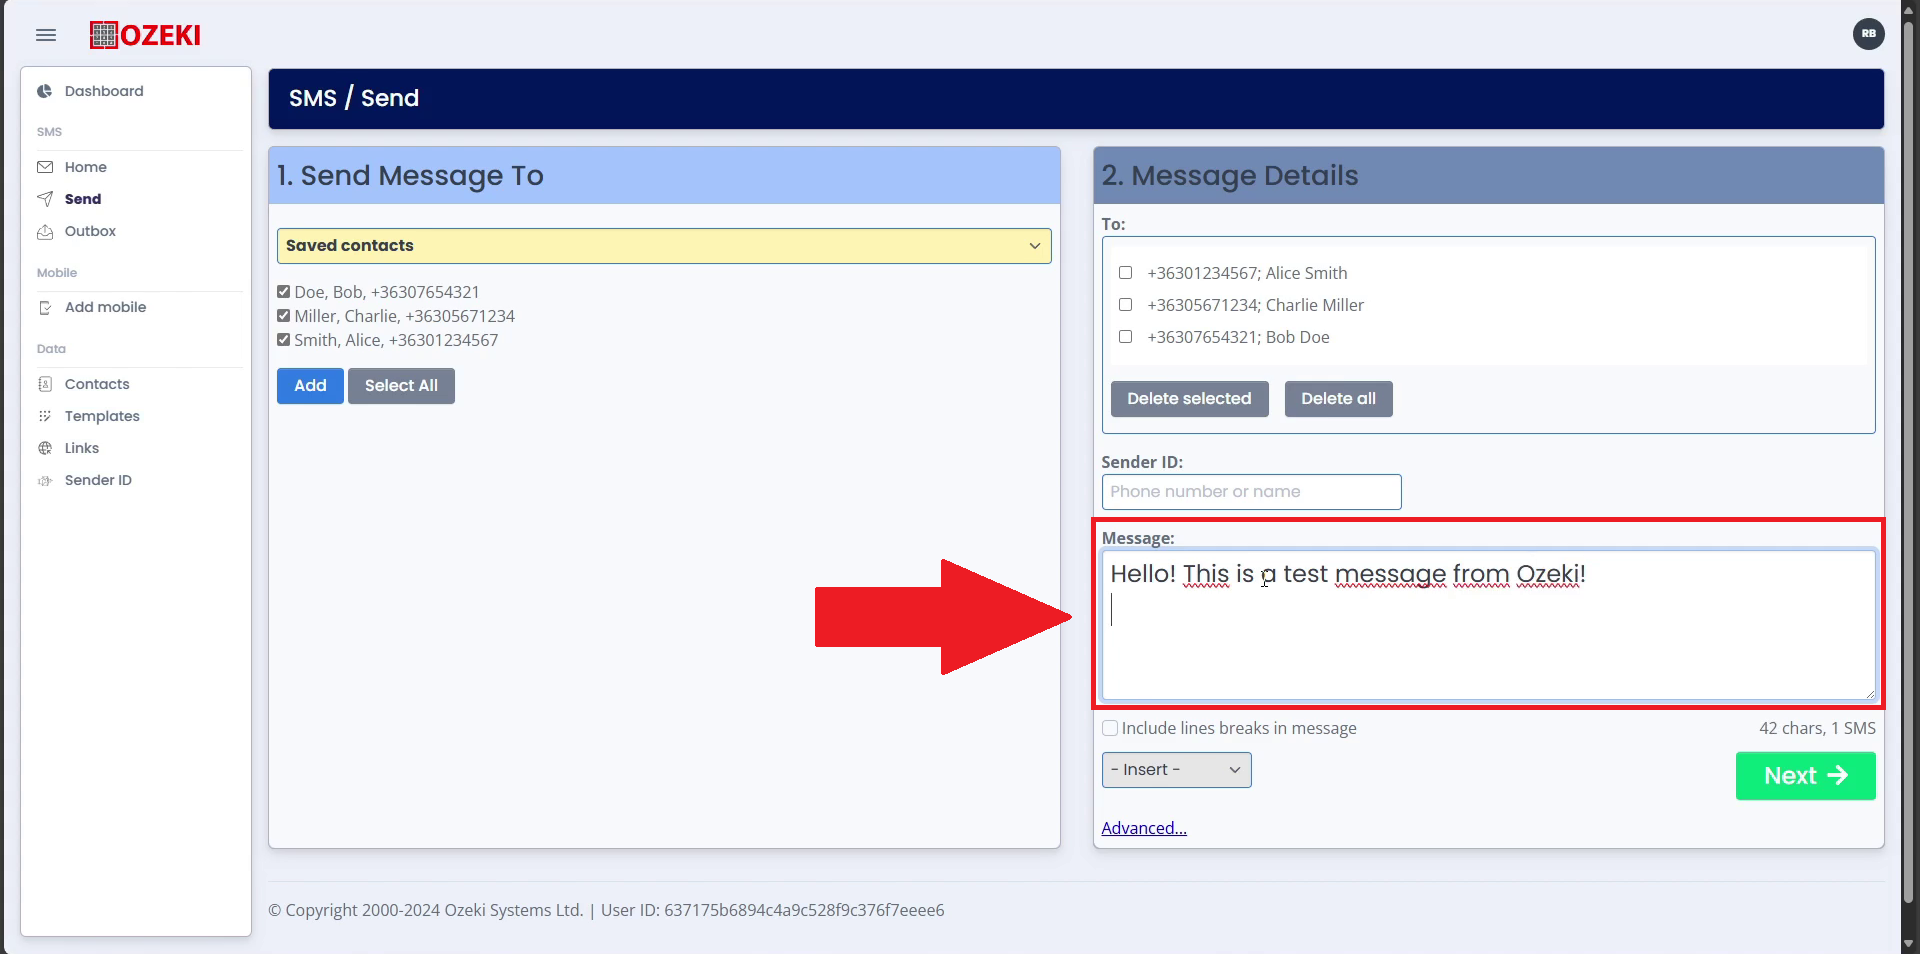
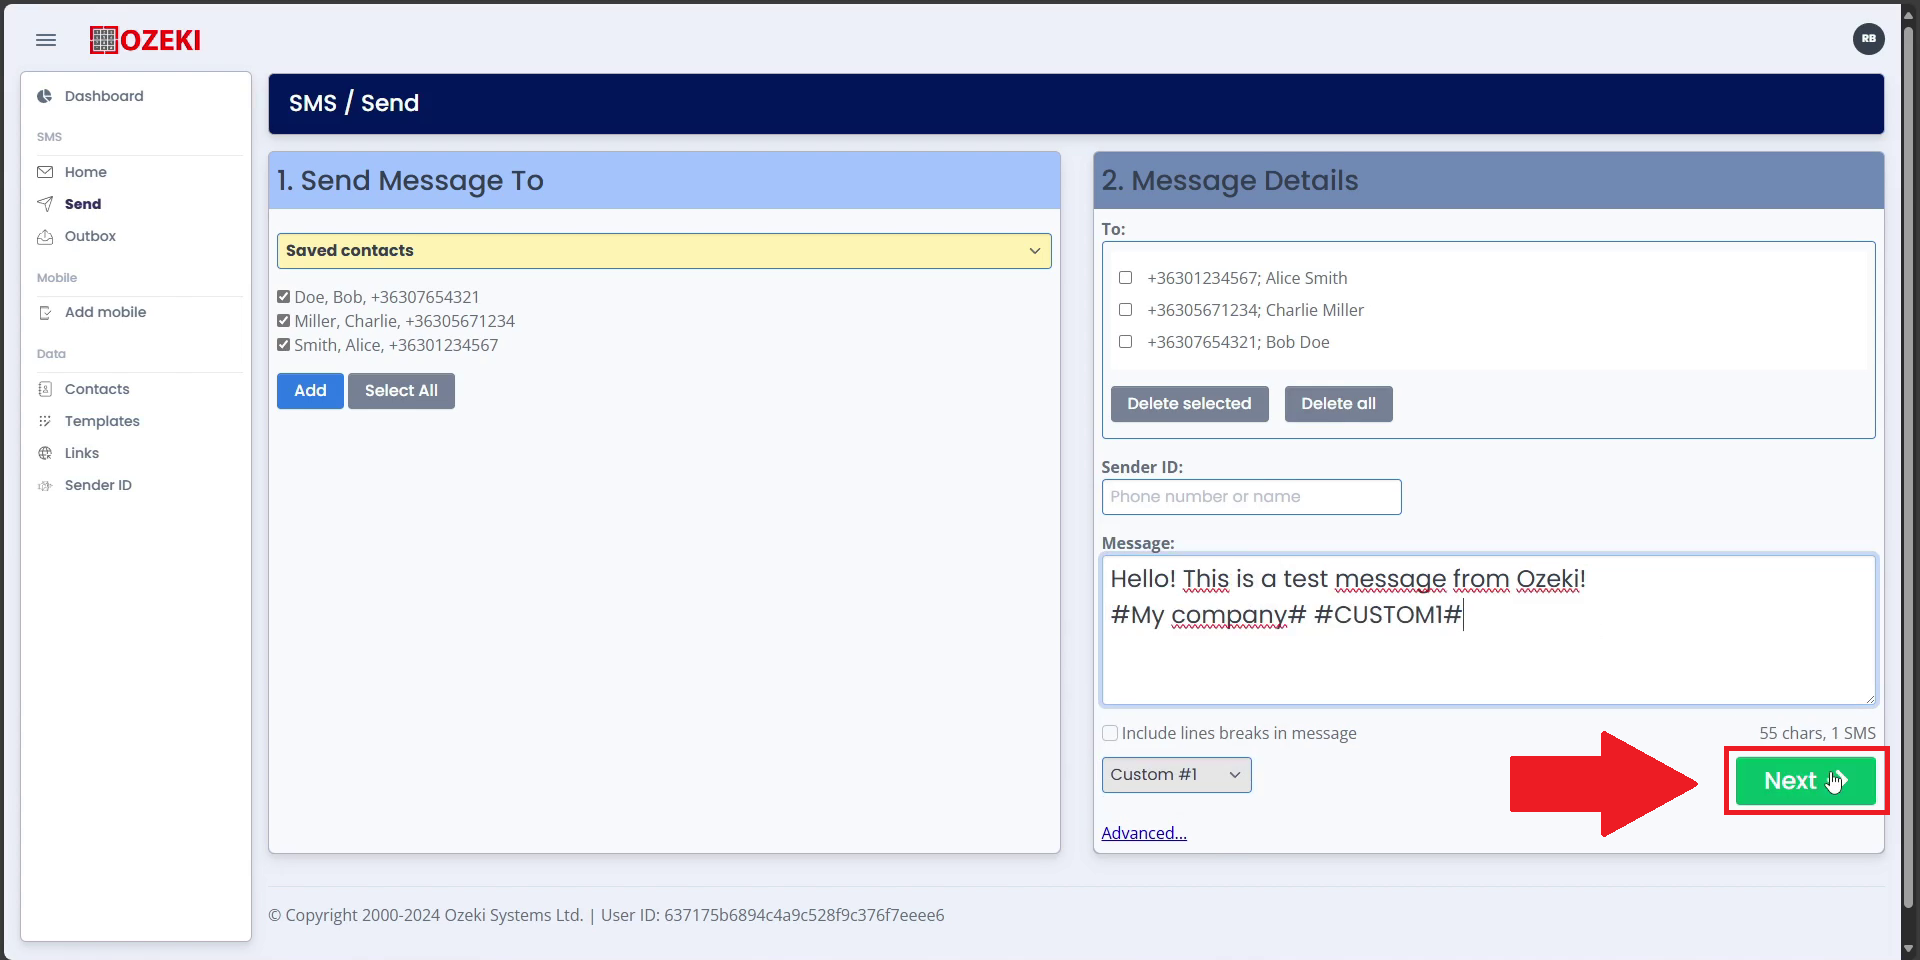
Step 22 - Edit your text message
Edit your message according to your campaign, include the recipients name so the message feels more personal and less automated!
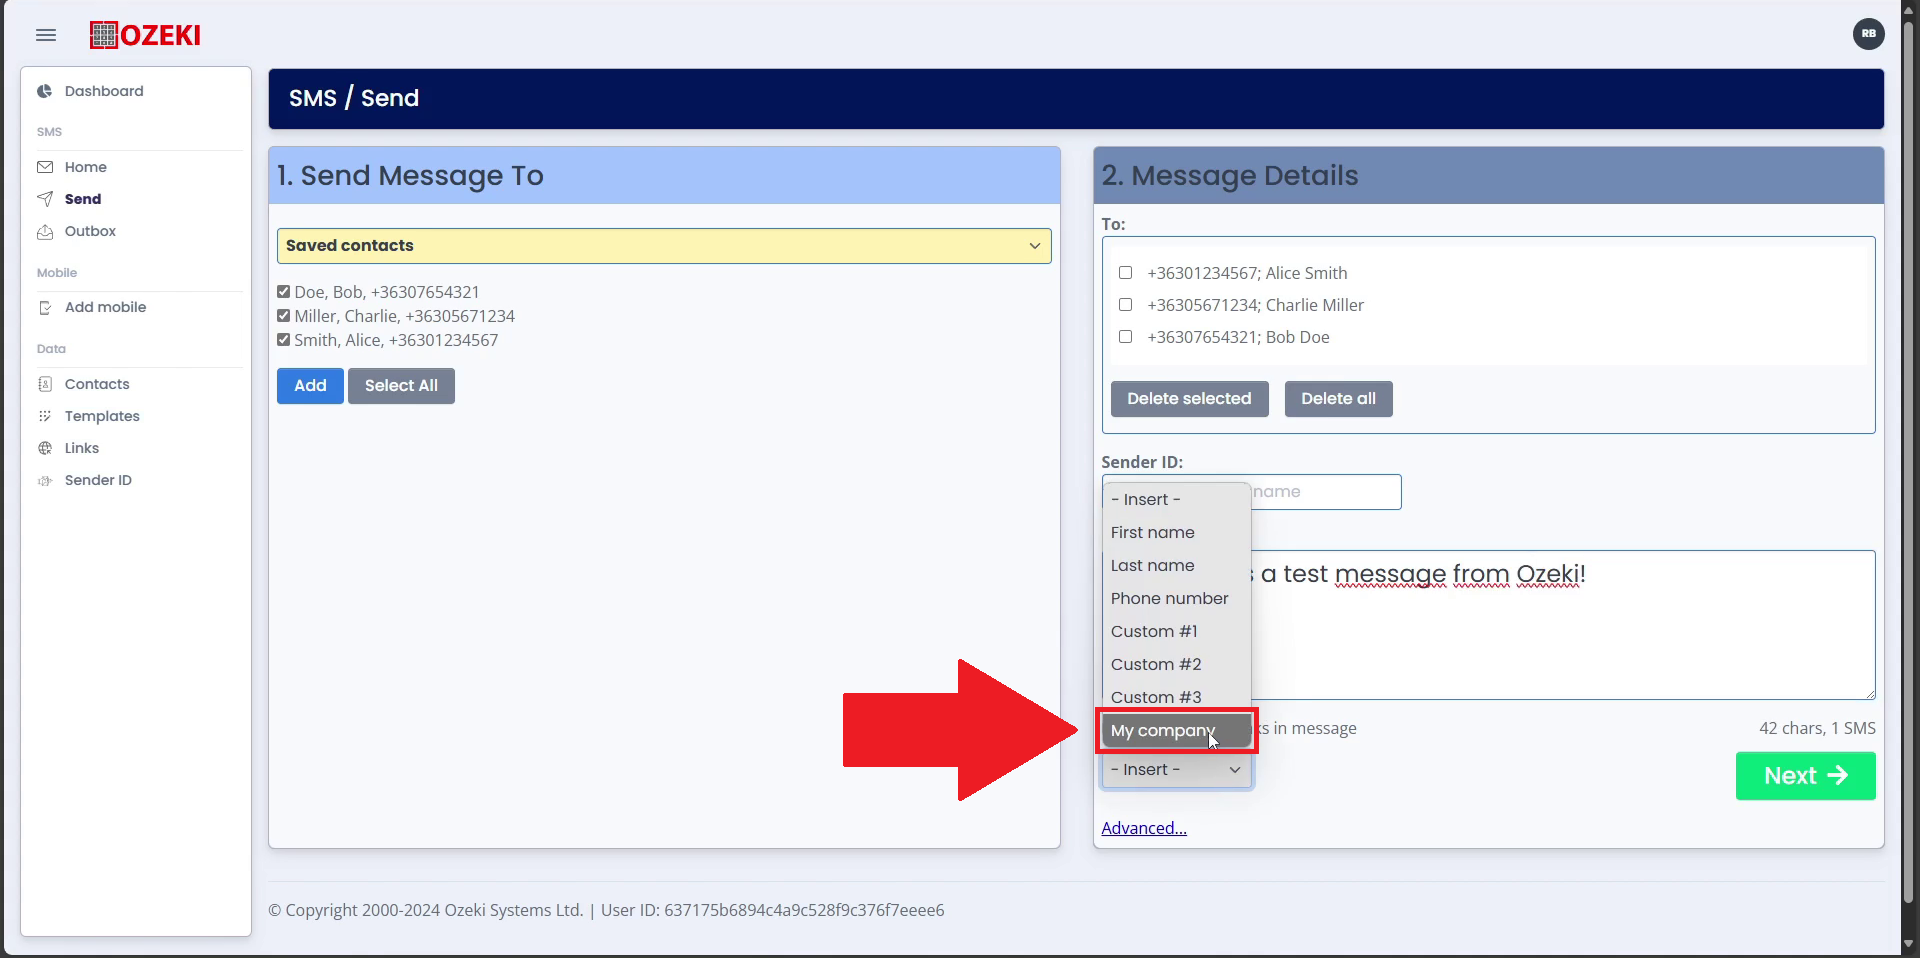
Step 23 - Insert custom text
To include custom, variable text in the message, use the insert dropdown.
Step 24 - Format and Finish
Once you are done with formatting, click the green "Next" button.
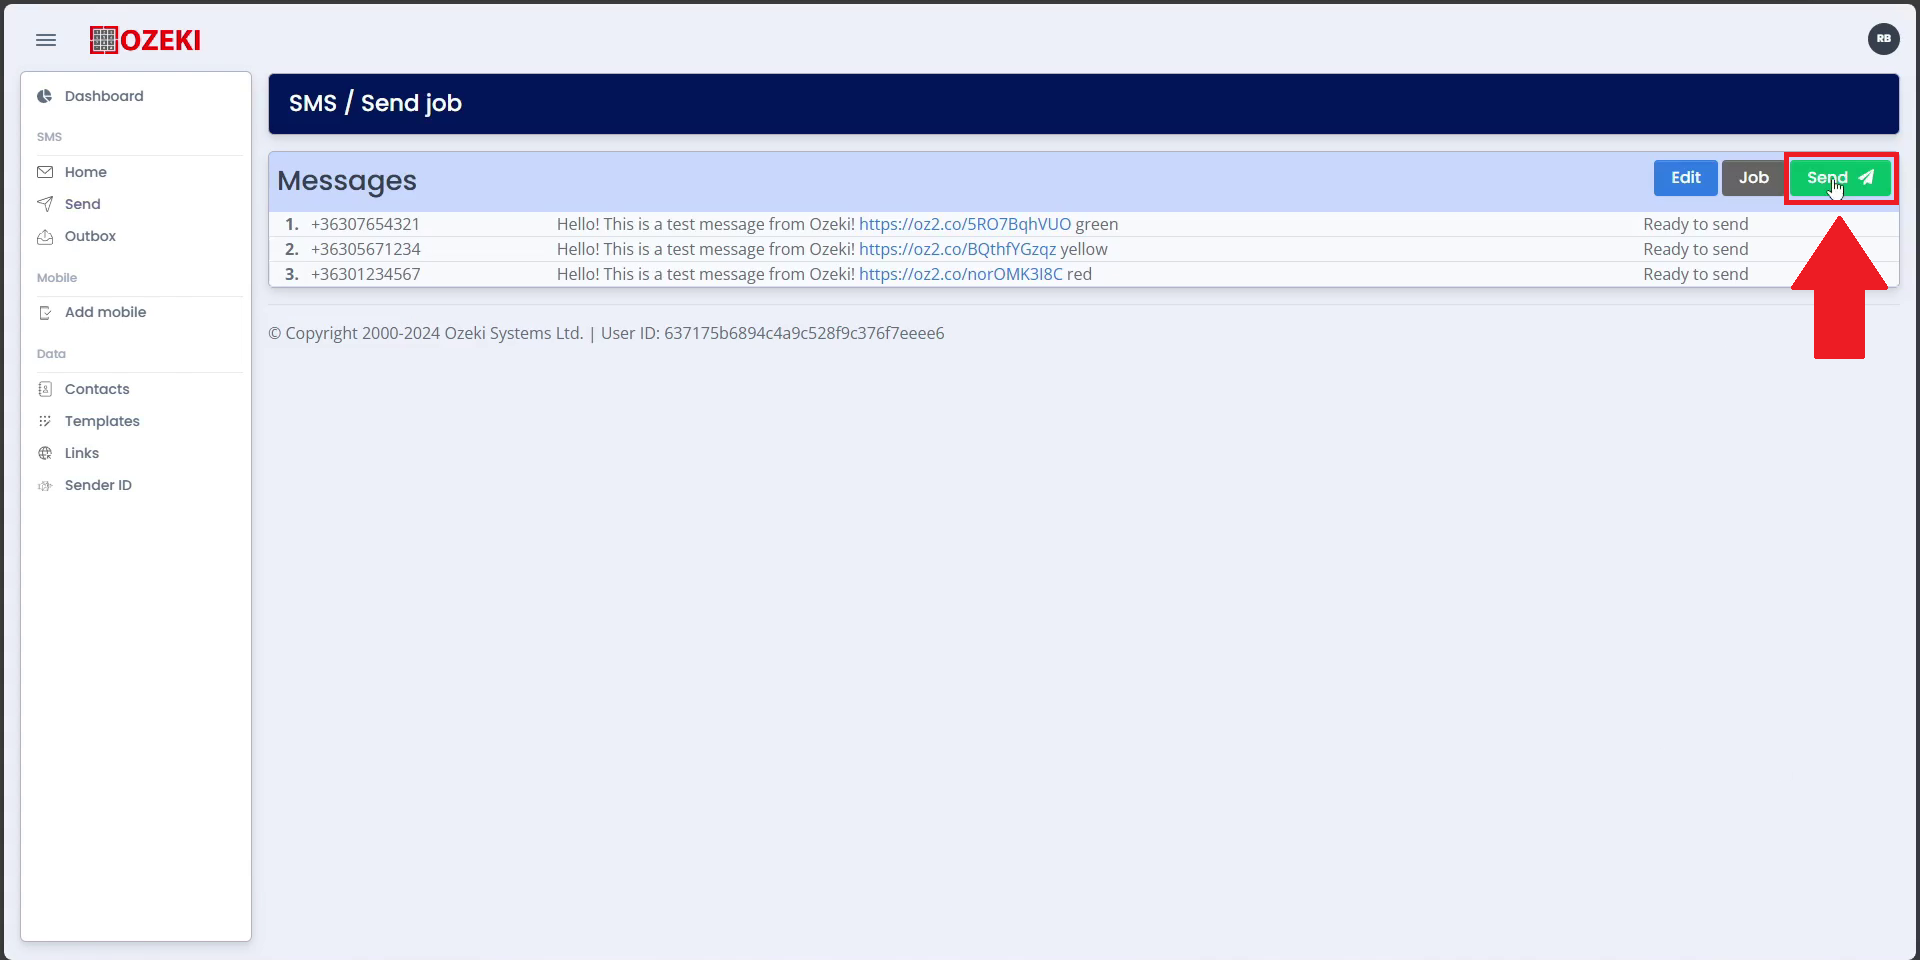
Step 25 - Send out your SMS Campaign
Click on the green "Send" button in the top right corner of the page. This will send the SMS to the contacts shown below in rows.
Video Tutorial