How to send a test SMS from Windows through your Android phone
This video shows how you can send a test SMS from Windows through your Android phone. You will see how the SMS is composed on the Test form, and what you should see in the logs of the Windows computer and in the logs of the Android device as the SMS goes from Windows to Android, then to the mobile network.
What is Ozeki Android SMS Gateway?
Ozeki Android SMS Gateway is an SMS app that turns your Android mobile phone into an SMS modem.
How to send a test SMS from Windows through your Android phone (Quick Steps)
Send a test SMS from Windows through your Android phone:
- Open Android SMS Client connection
- Select Test tab
- Fill Recipient phone number
- Fill SMS message
- Click send
- Message sent successfully
- View Test message log
- Congratulations! You have successfully tested your connection
How to send a test SMS from Windows through your Android phone (Video tutorial)
In this short, less-than-a-minute video tutorial, we'll guide you through the process of testing the Android SMS gateway from your Windows PC. Follow along as we start by opening the connection and progress to the test tab. Here, witness the simplicity of entering the recipient's phone number and a test SMS message and sending it. Receive instant feedback confirming the successful transmission of the message. At the end of the video, we show you the Events tab where you can view a detailed log of the test.
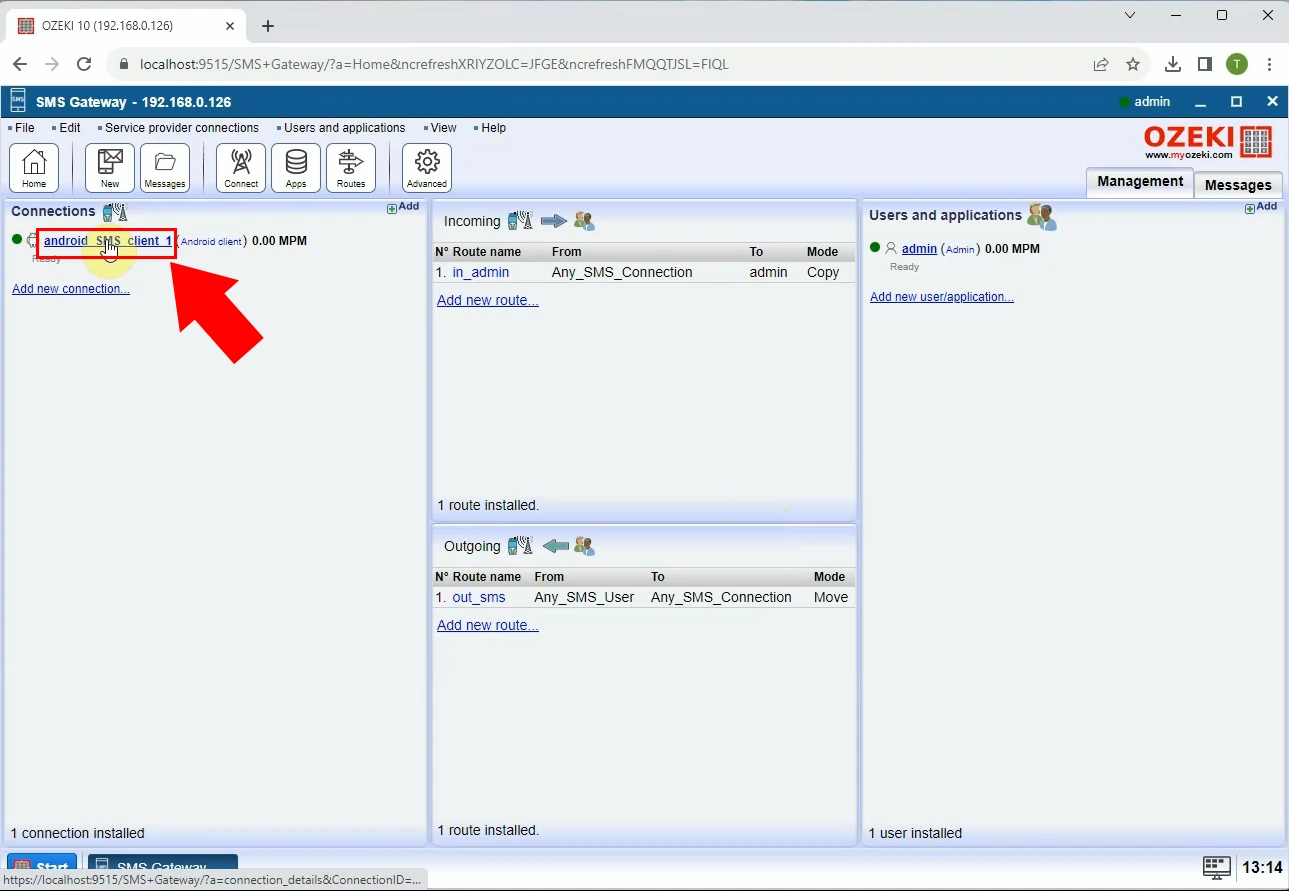
Step 1 - Open Android SMS Client connection
Navigate to the left side, and you'll find the Connection Panel. Inside this panel, locate and click "android_SMS_client_1" to open the connection (see Figure 1). Once clicked, it will open a tab dedicated to this connection, allowing you to manage it.
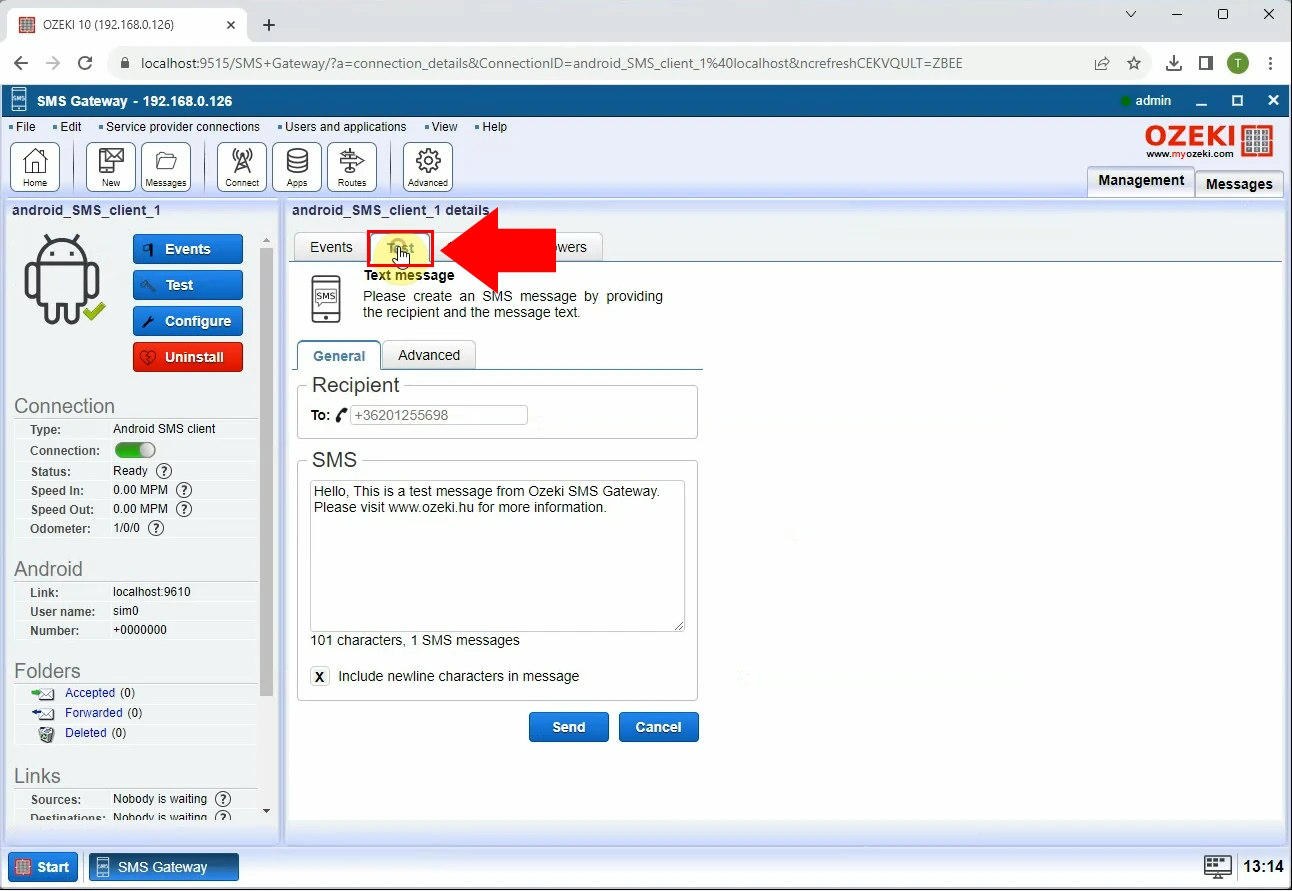
Step 2 - Select Test tab
Within the details of "android_SMS_client_1," there's a button labeled "Test" (see Figure 2). Click on it to access the "Test" tab page. Upon clicking, the Test page will open, providing you with the ability to send test SMS messages.
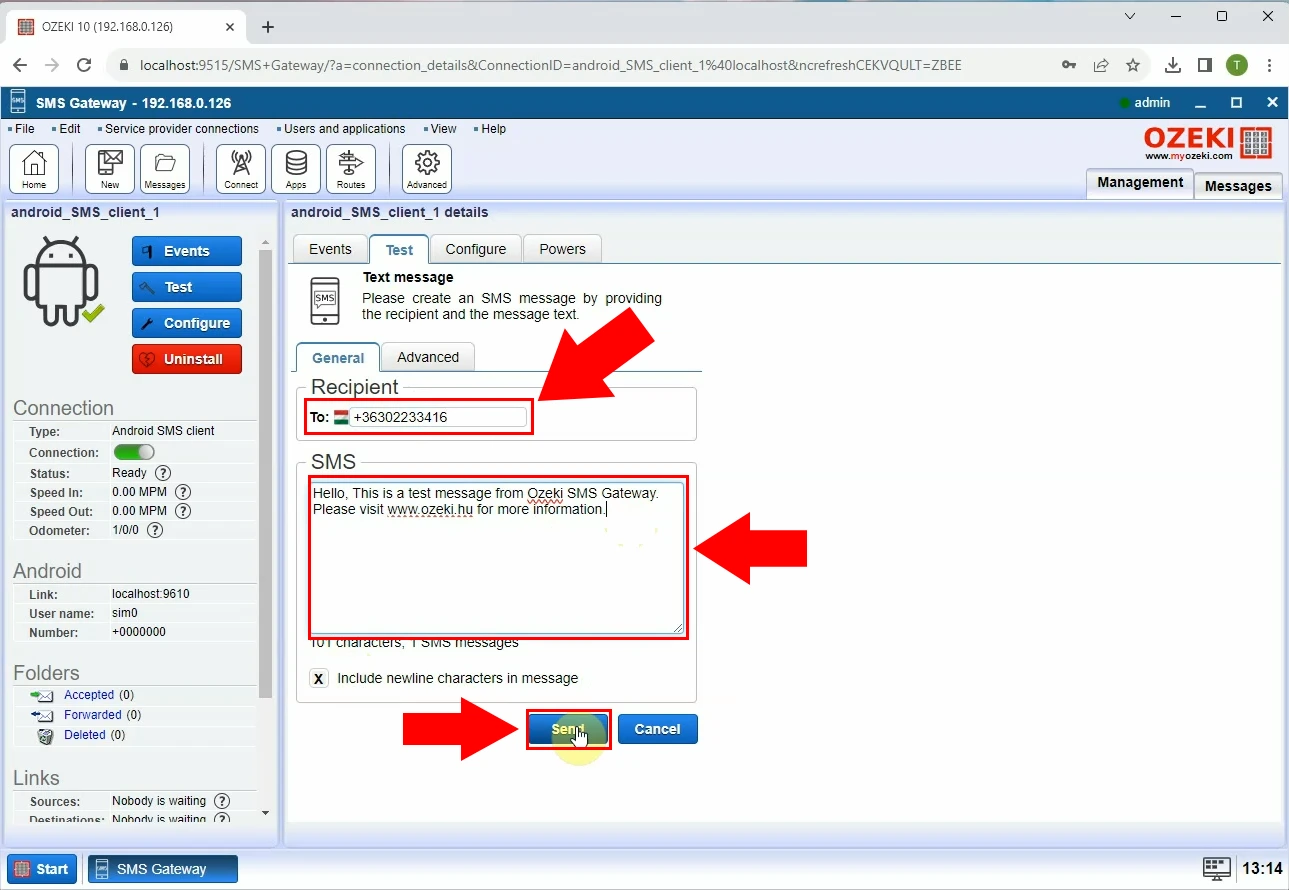
Step 3 - Send test message
Now, proceed to complete the Recipient Groupbox by entering the recipient's phone number to whom you intend to send the SMS message. For our example, the phone number is "+36302233416." Directly below, locate the SMS Groupbox where you can input the specific message you wish to send. Once both boxes are filled, just click the blue send button situated at the bottom to dispatch the message (see Figure 3).
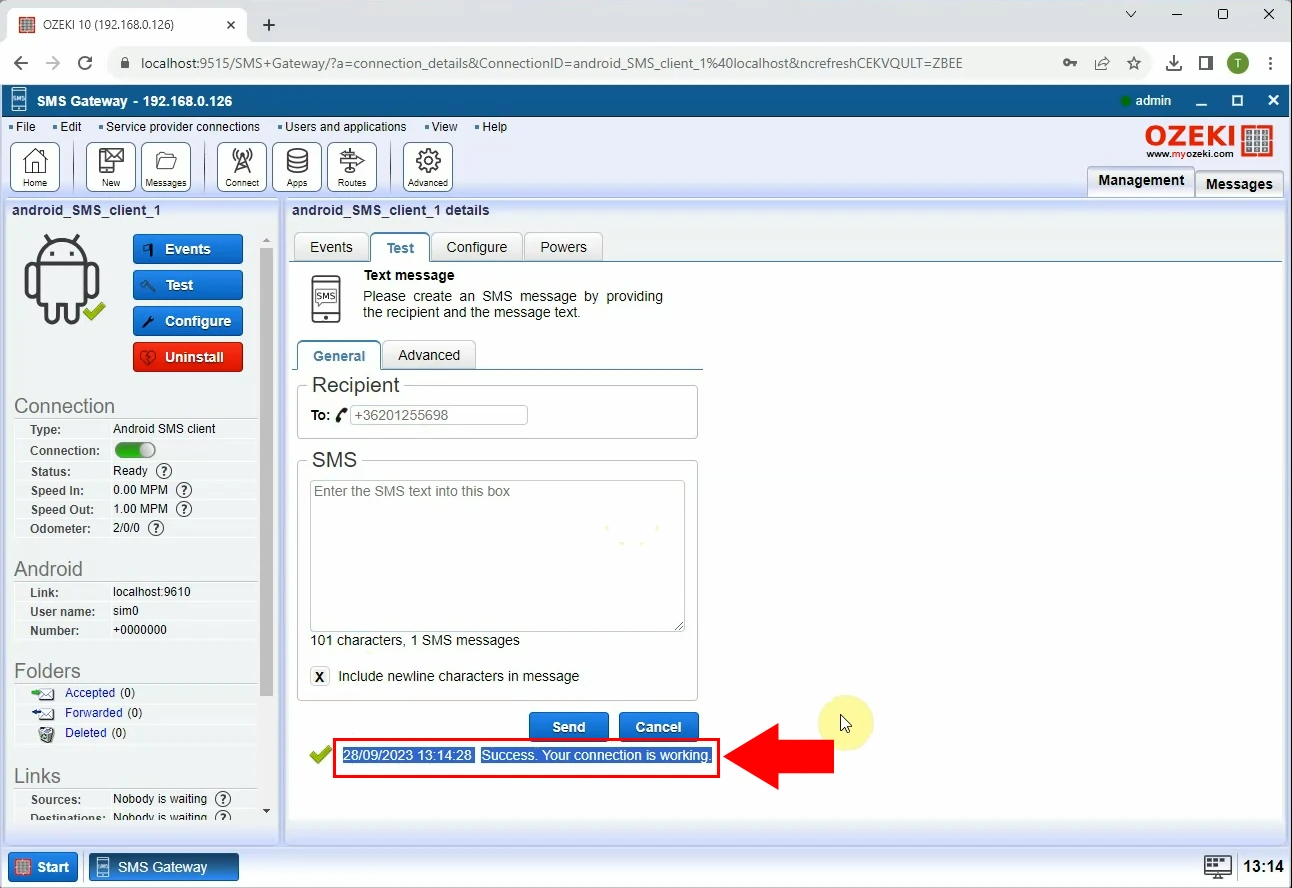
Message sent successfully
Once you've sent the message, you'll receive feedback at the bottom indicating "Success. Your connection is working" next to a green checkmark if everything is functioning correctly (see Figure 4).
Test message log
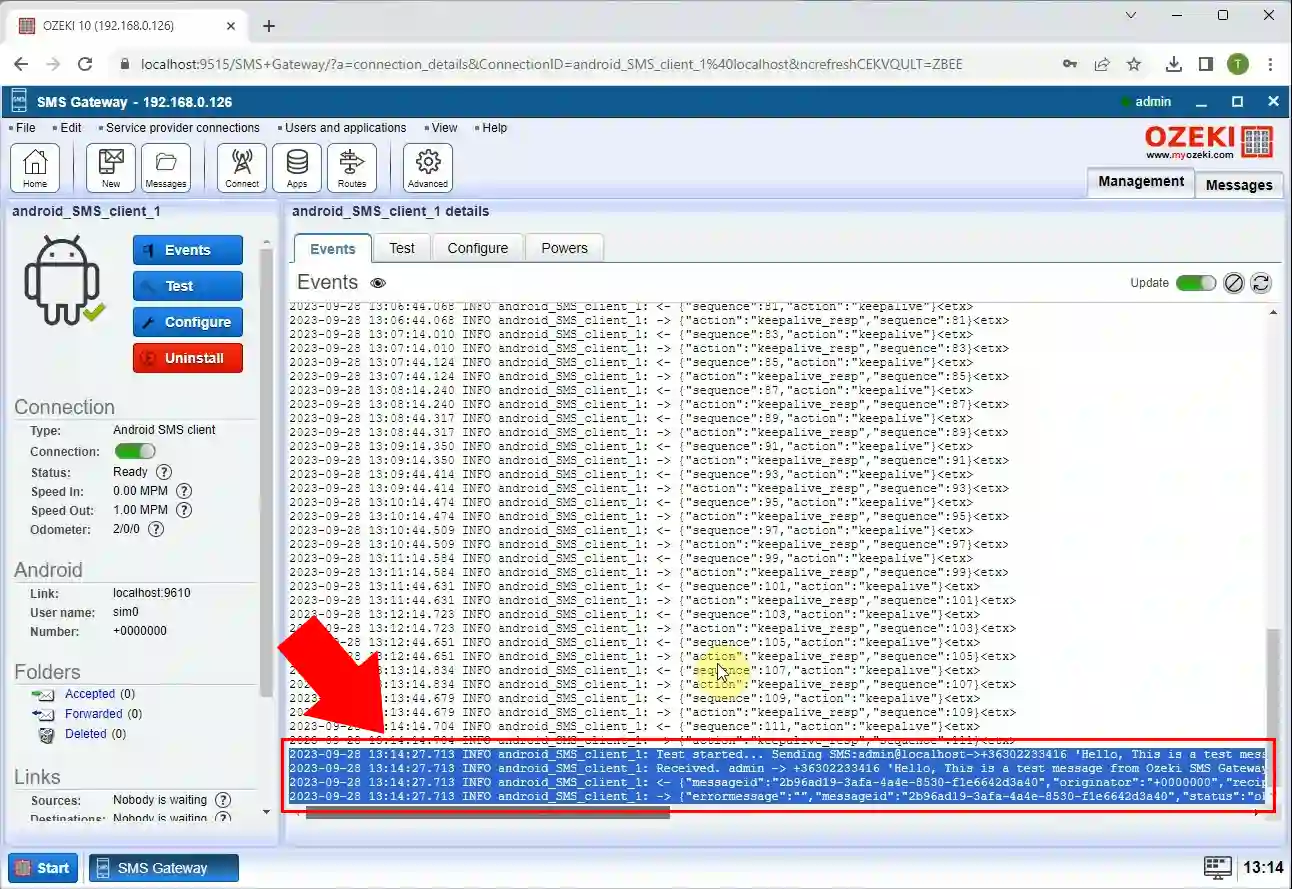
Within the details of "android_SMS_client_1," there's a button labeled "Events". Click on it to access the "Events" tab page. Here you can see a detailed log of the Test (see Figure 5).
Conclusion
We trust that the explanations provided were clear and easy to follow, ensuring you didn't encounter any difficulties. If you have followed the instructions closely, you should be able to send test SMS messages from your Windows PC trough Ozeki Android SMS Gateway without any problems. For those eager to explore further insights and discover the advantages of similar solutions, we invite you to delve deeper into the wealth of information available at ozeki-sms-gateway.com. Thank you for joining us on this journey, and we look forward to empowering your SMS communication experience further.
